Monday, October 3, 2011

The Valley Isle: Maui, No Ka Oi


I've been on a hiatus for 2 weeks because, you guessed it, we were in the Aloha State of Hawai'i. Actually, we were only in Hawaii for a week. The other week was spent getting back in the groove of things at home and at work. And plus, we were getting things set up for our daughter's first day of preschool this week. So its been quite hectic around the house this past week.

Our Hawaiian vacation was a long time in the making. Two years, to be exact. We've been holding off on vacations until hubby finished school. But all we did in the past 2 years was daydream about the day we get to finally go back to Hawaii for a vacation. And as soon as his last semester of school started, we began planning and booking our trip to the islands to not only celebrate hubby's finishing school and passing his boards, but to also celebrate our 8th anniversary. We've had this trip booked for 7 months and have been counting down the months and days since then. I guess you can say that this was a long awaited and well-deserved vacation. And so the next series of posts will be dedicated to our Hawaiian vacation.

Because this vacation was a long time in the making, we wanted to go all out and visit 2 islands. Whenever we go to Hawaii, we only usually go to the main island of Oahu. We've only been to one other island on our honeymoon, which was the Big Island of Hawai'i. And so we decided to add Maui to the mix of islands we've visited.

Maui is called the Valley Isle because of the numerous large valleys on the island. Maui is not as commercialized like Oahu is. Maui has more of its countryside preserved, whereas Oahu is almost overpowered with high rise hotels and tourists.


(the view from our room)

After a long day of travel, we finally arrived at our hotel at the Westin Maui Resort and Spa in the late afternoon. We settled into our room and decided to have dinner at one of the hotel's restaurants, 'Ono Bar & Grill, which featured traditional American favorites with an island twist. Like this plate of onion rings topped with furikake seasoning:

Furikake is a mix of different seasoning and shaves of nori/seaweed. I learned on this trip that almost everything is topped with furikake, which gives the dish a good and slightly salty taste.

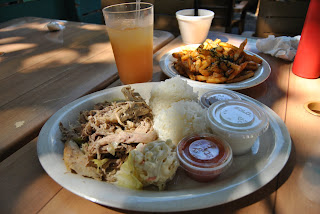
A traditional Hawaiian meal usually consists of Kalua pork, which is the infamous roast pork slow-cooked in the ground. I love Kalua pork, so when I saw that they served it in a sliders form, I was all over it. The pork was so flavorful. And not too salty, unlike some Kalua pork I've had. Serving this with a side of taro chips really completed the meal.

Hubby ordered the Kahuna Dog, a traditional hot dog, topped with their house chili that is slightly sweet, cheese and other toppings.

What was great about this restaurant was that kids ate free for each paying adult. So our daughter's meal of spaghetti was free. A plus, especially since everything sold in Hawaii can be pretty pricey.

Our body clock was pretty much still on Pacific time, so after dinner, we turned in early. Besides, it had been a long day and we were very exhausted.

(our first Maui sunset. Breathtaking.)

Our vacation package included free daily breakfast buffet, again at 'Ono Bar & Grill. The breakfast consists of the typical pancake/french toast/waffle choices, eggs, and breakfast meat (bacon, sausage or Portuguese sausage, which happens to be my favorite), fruits, bread, and cereals. A pretty good spread.

And the view wasn't bad either. We were given a choice to eat poolside, or with an ocean view. And of course, we asked for the the ocean view.
(our view every morning at breakfast.)

After we were stuffed with our awesome breakfast, off we went to start our activities for the day. Everyone I knew who's been to Maui told me that I HAD to the road trip to Hana. Its literally about 4 hours of a road trip, filled with 600+ sharp turns on the side of a hill heading to the town of Hana. And along the way, you'd encounter several waterfalls and amazing views. Supposedly, there really wasn't much to Hana, but everyone said that it wasn't about the destination, it was all about the experience of the drive. I knew going into the road trip that I may not be able to make it all the way to Hana because I get car-sick pretty easily. Needless to say, we only made it about a quarter of the way and about an hour-and-a-half of driving, that I asked hubby to turn the car around. I got seriously car-sick. And I figured, the further we went meant it would take twice as long to get back. My stomach wasn't gonna handle another minute. So we made frequent stops when we headed back to get fresh air. Hubby and I were quite disappointed. Aside from the views of the ocean, we didn't see any waterfalls. This was pretty much a wasted road trip. I could've been sitting on the beach. Oh well.

After finally making it down to a smoother ride, my stomach went back to normal and we began to get hungry. We wanted to eat where the locals ate. And what's more local than a plate lunch? I read a lot of great things about Aloha Mixed Plate on Yelp, so we decided to check it out.

A mixed plate lunch is a typical Hawaiian meal. Its origins began in the early plantation days, when plantation workers of different ethnic backgrounds (native Hawaiian, Japanese, Korean, Chinese, Portuguese, Filipino) brought and shared their native specialties with one another. And the "mixed plate" was born. Aloha Plate Lunch specializes in different mixed plates, and is always served with a couple of scoops of steamed white rice and macaroni salad. We started our meal with the garlic fries, again topped with furikake.

I ordered the BBQ mixed plate, which consisted of BBQ chicken, teriyaki beef, and kalbi short ribs. So "ono" (good/delicious).

Hubby ordered the Hawaiian plate that consisted of Kalua pork and lomi lomi salmon.

We had planned on eating light for lunch because we were going to a luau for dinner, but we just couldn't resist the plate lunches. Its one of our favorite things to eat. And we ate it all up.

After our meal, we headed back to the hotel for a quick dip at the beach before our luau at the hotel.

(sunset before the luau)

We've been to quite a few luaus in Hawaii since our honeymoon. Its a very touristy thing to do, and we vowed to not do it often (or at all), but this was our daughter's first experience in Hawaii. What better to experience Hawaii than to party it up "Hawaiian style" with a luau. Besides, I want some more Kalua pork :)

While waiting for the luau to start, we were served with a bottomless supply of drinks (alcoholic and non-alcoholic). I wasn't much of a drinker, but since I was on vacation, why not? I had a few sips of the Mai-Tai and the Blue Hawaiian, which was quite good and not too strong on the alcohol. Yeah, I'm a light-weight.

Our first course was an array of pupus such as lomi lomi salmon (raw salmon ceviche), poke (ahi tuna), salad, and pipi kaula (beef jerky).

Our main course consisted of Kalua Pork, of course, teriyaki beef, and mahi mahi.

And finally, for dessert, we had a macadamia nut tart, pineapple upside down cake, Kona chocolate cake, and haupia (a Hawaiian coconut dessert).

During the meal, we were entertained by dancers performing an array of Polynesian numbers.

The luau was a great way to end our Anniversary day and the end of our stay in Maui. Our stay on Maui was pretty relaxing. Residents of Maui take pride in living there. We were glad to have experienced this other island because now we understand why "Maui, No ka oi" (Maui, the best).

Tuesday, September 13, 2011

Olive Garden Alfredo Sauce


I used to have a go-to Alfredo sauce a while ago buried in my binders of recipes. Unfortunately, I lost the recipe. But after doing a quick search, I found another great recipe for Olive Garden's Alfredo Sauce. I used to always buy a pint of Alfredo Sauce from Olive Garden and so I was really excited to have found this recipe. This is a nice sauce to keep in the fridge and use for a quick dinner. You can add shrimp and chicken to it when you're ready to use it and you've got a nice, delicious meal for the family.

1 pint heavy cream
2 sticks butter
2 Tbsp. cream cheese
3/4 cup grated Parmesan cheese
1 tsp. garlic powder
salt & pepper to taste

1) In a medium saucepan, combine heavy cream, butter and cream cheese. Simmer on medium heat until everything is melted, stirring occasionally. Add Parmesan cheese and garlic powder. Simmer on low for 15-20 minutes.

2) Season with salt and pepper to taste. Serve over your favorite pasta.

Monday, September 12, 2011

Magnolia Bakery Vanilla Cupcakes


I think my pursuit for the perfect Vanilla cupcake recipe has ended here.

I love Vanilla cupcakes. I think I love it more so than a chocolate cupcake. Take me to a cupcake store and I'll most likely choose cupcakes that are vanilla based rather than chocolate based. Don't get me wrong. I still love my fair share of chocolate. But there's something about vanilla cupcake that I can't resist.

I've been looking for the perfect Vanilla cupcake recipe ever since I made them last year for Halloween. I wasn't too happy with that recipe and I vowed to find the recipe that is as close to the ones I get at my favorite cupcake stores. And then I found this recipe from Martha Stewart for the Magnolia Bakery Vanilla Cupcakes. I've had the actual cupcakes from the Magnolia bakery before when my sister-in-law brought some during one of our visits to my mother-in-law. They were so delicious. So you can only imagine the excitement I had when I found this recipe.

These were quite easy to make. However, you need to make sure to not over-fill the cupcake liner with the batter because it will puff up and burn on the sides like they did on mine. But the cupcake tastes just as good as the bakery itself. Light and fluffy cake, sweet and decadent frosting. The perfect combination.

Cupcakes
1 1/2 cup self-rising flour
1 1/4 cup all purpose flour
2 sticks unsalted butter, softened
2 cups sugar
4 large eggs, at room temperature
1 cup milk
1 tsp. pure vanilla extract

1) Preheat oven to 350 deg F. Line muffin tins with paper liners. Set aside.

2) In a large bowl, combine flours together and set aside. In a bowl of an electric stand mixer, cream butter until smooth and creamy. Gradually add sugar, beating until fluffy, about 3 minutes. Add eggs, one at a time, beating well after each addition.

3) Add dry ingredients in 3 parts, alternating with the milk and vanilla. Scrape down the sides of the bowl with each addition. Beat until ingredients are incorporated, but do not over beat.

4) Using an ice cream scoop, scoop batter into prepared liners about half to 3/4 full. Bake for 20-25 minutes, or until toothpick test comes out clean. Rotate pan half way through the baking. Cool for 15 minutes and transfer cupcakes to a wire rack to cool completely before frosting.

Vanilla Buttercream
2 sticks unsalted butter, softened
6-8 cups confectioner's sugar
1/2 cup milk
2 tsp. pure vanilla extract

1) In a bowl of an electric stand mixer, combine butter, 4 cups of the confectioner's sugar, milk, and vanilla extract. Beat on medium speed until smooth and creamy, about 3-5 minutes.

2) Gradually add remaining sugar, 1 cup at a time, beating for about 2 minutes after each addition, until desired consistency. Frost cupcakes and serve at room temperature.

Saturday, September 10, 2011

Hot Browns


This is another one of hubby's favorites that came about as an experiment. I was experimenting, at one point, with plain turkey sandwiches. Instead of regular turkey sandwich with the standard tomato, cheese, lettuce, etc., I started playing around with it by adding a fried egg and toasting the bread. Sounds yummy, huh? Then one day, I was watching Throwdown with Bobby Flay on the Food Network and they featured Hot Browns. I had no idea what Hot Browns were. Its an open-faced sandwich of turkey, tomato, and bacon, topped with a white sauce called a Mornay sauce. Its apparently a Southern favorite, and was originally created at the Brown Hotel in Louisville, Kentucky.

I saw this sandwich being made on the throwdown and so I decided to give it a shot and put a twist to my experimented turkey sandwich using my white sauce from my Chicken Cordon Bleu recipe. The end product was a gooey, yummy spin on an old classic that hubby absolutely loves.

slices of sandwich bread (white or wheat), toasted
turkey slices
tomato slices
White Sauce
4 cooked bacon slices

1) Preheat oven (or toaster oven) to broil. For each hot brown, place 2 slices of toast on a baking sheet. Place a liberal amount of turkey slices on top of the toast. Top with with desired amount of tomato slices. Ladle desired amount of white sauce on top of sandwich. Place entire dish under the broiler until sauce is bubbly. Remove from broiler and top with a slice of bacon. Serve hot.

Monday, September 5, 2011

Chicken Cordon Bleu


I've been making Chicken Cordon Bleu for a long time. Its one of hubby's favorite dishes that I make. I first had a taste of this delicious chicken dish when one of my aunts catered a party for my mom. And ever since then, its all we ask her to make for us. Her Chicken Cordon Bleu is served with a white sauce that just makes it over-the-top yummy. Unfortunately, my aunt retired from catering and only does on rare occasions. So where was I going to get my Chicken Cordon Bleu fix? I've seen frozen versions at my favorite store, Costco. I gave it a try, but it just tastes......frozen. And it didn't have the white sauce that I loved. So I decided to try to make my own version and came up with this recipe.

I used to make the sauce out of a powdered cheese sauce that I bought at the supermarket. But I decided to experiment using the beschamel base from my Macaroni & Cheese recipe and came up with my own cheese sauce that's just as yummy as my aunt's.

Chicken
4 boneless, skinless chicken breast
ham slices
4 slices Swiss cheese
2 cups panko bread crumbs
1/2 cup grated Parmesan cheese
1 egg
1 cup milk
salt & pepper to taste

1) Preheat oven to 375 deg F. Line a rimmed baking sheet with foil and set aside.

2) Place chicken breast, one at a time between 2 pieces of plastic wrap. Squirt chicken lightly with water and squirt the top of the plastic wrap as well. Pound chicken to no less than 1/8 inch thickness. Season with salt and pepper.

3) Lay flattened chicken on a new piece of plastic wrap. Place ham slices on the center of the chicken breast. Place a slice of Swiss cheese on top of the ham. Using the plastic wrap to assist, fold in the ends of the breast and tightly roll the breast into a log, enclosing the ham and cheese.

4) In a small bowl, whisk together milk and egg. In another small bowl, combine panko breadcrumbs and Parmesan cheese. Lightly coat prepared chicken with breadcrumb mixture, then dip in the egg mixture. Dip chicken back in the breadcrumb mixture again, patting it down firmly so that the breadcrumbs stick to the chicken. Place on prepared baking sheet and bake for 30-35 minutes. Let chicken sit for about 5 minutes before serving with the white sauce.

White Sauce
3 Tbsp. unsalted butter
1/4 cup all purpose flour
2 3/4 cup milk
1/2 tsp. salt
1/8 tsp. nutmeg
1/4 tsp. black pepper
3/4 cup grated Parmesan cheese

1) In a medium saucepan, melt butter over medium heat. Whisk in flour. Continue to whisk for about 1 minute. Whisk in milk and continue whisking until there are no longer any lumps. Allow mixture to boil, whisking occasionally. Sauce will begin to thicken.

2) Add salt, nutmeg, black pepper and Parmesan. Stir until combine. Remove from heat and serve.

Tuesday, August 30, 2011

Moon Pies


I have never really had moon pies before, but I remember I used to see them being sold in individual packets at the supermarket when I was a kid. I did, however, eat my fair share of mallow-mars. Those were my fave. As I got older, I learned that moon pies were somewhat similar to mallow mars, with the marshmallow filling in between the layer of cookies in the moon pies. Unfortunately, they don't sell moon pies in our area anymore, so I'm left with the regret of not having tasted them. And then I found this recipe, from, once again, the Brown Eyed Baker.

As with any sandwich cookies, these were a multi-step process. Making the cookies, cooling the cookies, making the filling, making the coating, and assembling. But these were so worth the task. I can't believe I've never tried a moon pie before. These were so delicious and I absolutely love the creamy marshmallow filling in the middle. You can bet I'll be making these again.

Cookies
1 stick unsalted butter, at room temperature
3/4 cup light brown sugar
1 egg
1 tsp. vanilla extract
2 1/4 cups all purpose flour
1/2 tsp. salt

1) With the mixer on medium speed, beat the butter until creamy, about 3 minutes. Add brown sugar and beat on medium-high until light and fluffy, about 3 minutes. Reduce speed to medium and add egg and vanilla extract and beat to combine. Reduce speed to low and slowly add flour and salt. Continue mixing just until a soft dough forms. Divide dough into two, shape into disks, wrap in plastic wrap and refrigerate for at least 30 minutes.

2) Preheat oven to 350 deg F. Line 2 baking sheets with parchment paper and set aside. Working with one disk at a time, roll out dough to about 1/8-inch thickness. Cut out the rounds and place on prepared baking sheets about 1/2-inch apart. Refrigerate cookies on the cookie sheet for about 10 minutes.

3) After chilling the cookies, bake for 10-12 minutes, or until lightly browned. Cool on the pans for a few minutes, and then transfer on a cooling rack to cool completely before assembling.

Marshmallow filling
2 egg whites
pinch of cream of tartar
pinch of salt
2/3 cup light corn syrup
2 tsp. vanilla extract
1 cup confectioner's sugar, sifted

1) Using a mixer with a whisk attachment, beat egg whites, cream of tartar and salt on medium low speed for about 2 minutes. As the egg whites increase in volume, increase speed to medium high speed and continue beating until firm, stiff peaks form.

2) Meanwhile, in a small saucepan, boil corn syrup over high heat without stirring until temperature reaches 230-235 deg F. Slowly drizzle hot syrup over egg whites and beat at high speed until glossy, about 2 minutes. Reduce speed to medium-low and add vanilla extract and confectioner's sugar.

3) Using a piping bag or spoon, mound about 1 1/2 tablespoonful of the filling into the center of a cookie. Top with another cookie and press lightly to spread filling to the edges. Add another mound of filling on top of the second cookie and top with another cookie, again pressing lightly to spread filling to the edges. Repeat with the rest of the cookies.

Chocolate coating
12 ounces semi-sweet chocolate
1/4 cup vegetable oil

1) Using a double boiler or microwave (on 30 second increments), melt chocolate and vegetable oil together until completely smooth. Place assembled cookies on a wire rack set over wax paper or rimmed baking sheet. Spoon melted chocolate over each cookie so that it runs down the sides and covers most of the cookie. Allow the chocolate to set at room temperature for about 2 hours, or refrigerate to speed up the process. Store in an airtight container at room temperature.

Monday, August 29, 2011

Homemade Cracker Jack


I didn't eat much of the childhood favorite, Cracker Jacks. I don't know why, but I just wasn't in to the boxed popcorn stuff. Even the prize you get from the Cracker Jacks box didn't appeal to me. It took me a while to even start liking the popcorn you buy that came in those large tin containers. You know, the ones they normally sell during the holidays. To me, they were just plain stale. I like freshly made popcorn. Whether it be fresh buttered popcorn or freshly made caramel corn. They have to be fresh.

My daughter has been asking me to make some popcorn snacks recently and so I decided to give this recipe a try from the Brown Eyed Baker. I've never made caramel corn before. And it was quite easy and yummy.

10 cups freshly popped plain popcorn
1 cup light brown sugar, lightly packed
1/4 cup light corn syrup
6 Tbsp. unsalted butter, melted
2 Tbsp. water
1/4 tsp. salt
2 tsp. vanilla extract
1/2 tsp. baking soda
1 cup lightly salted peanuts

1) Preheat oven to 250 deg F. Line a rimmed baking sheet with parchment paper and set aside.

2) Coat a large bowl with non-stick cooking spray and pour popcorn in the bowl.

3) In a small saucepan, whisk together brown sugar, corn syrup, melted butter, water and salt. Bring to a simmer over medium-high heat. Continue to simmer, stirring often, until mixture reaches 250 deg F, about 3-5 minutes.

4) Remove caramel from heat. Whisk in vanilla extract and baking soda. Immediately pour caramel onto popcorn. Add peanuts. Gently fold mixture using a rubber spatula until everything is coated with the caramel. Transfer mixture onto prepared baking sheet and spread out. Bake for 1 hour, stirring the mixture every 20 minutes.

5) Cool popcorn on a wire rack for 20 minutes. Gently break up the popcorn. Serve immediately or store in an airtight container for up to 5 days.

Sunday, August 28, 2011

San Francisco is not just about Clam Chowder anymore

My family and I always take the long drive up north to the Bay Area at least once a year to escape the heat here in SoCal and visit one of my cousins. Its a good thing we went up there this weekend, because I was hearing that temperatures reached well over 105 degrees, while temperatures in the Bay Area was in the upper 60's. Nice.

Anyway, every year we always head to the same attraction. Pier 39. For the clam chowder and Trisha's mini donuts, which my brother cannot live without while in San Francisco. Don't get me wrong. I love clam chowder and mini donuts as much as the next gal. But I wanted to do something different this time. I wanted to make this more of a foodie trip. So I did some research and found out about The Ferry Building Marketplace.

The Ferry Building serves as a terminal for ferries that travel across the San Francisco Bay.


It also has a marketplace inside its corridors, which I was really excited about. The marketplace houses numerous specialty food shops and outside of the marketplace is a farmer's market every Tuesday, Thursday and Saturday. However, I'm not here for the farmer's market, but what's inside the marketplace.


We entered the marketplace at the center of the corridor and the first thing we encountered was Miette. And you know me and my sweet tooth.


I took home some of these goody French Macarons, along with some homemade marshmallows and meringue cookies that my daughter requested.


The one thing I was most excited about was Chris Cosantino's Boccalone.


They're known for their dried and cured meats like salami.

I wanted to try out a sandwich and so we ordered their Muffaleta, which had a few cuts of cured meat and olive tapenade all wrapped in a french baguette. It was delicious.


As we proceeded further into the corridor, we came across a side vendor selling the Italian donuts called Bomboloni. There were plain bombolonis, and there were bombolonis filled with different flavored custards such as vanilla, peach, chocolate, and pistachio. My favorite was the plain vanilla custard. The dough had a hint of orange.


There were other specialty shops for cheese, wine, olive oil, organic beef in the marketplace. And then I came across a mushroom stand, where you can purchase this mushroom tree to grow at home.


I wish we had more time to explore the Ferry Building. We only allotted a couple of hours for this stop because we still had to make time for Pier 39 and Trisha's mini donuts. However after Pier 39, we decided to do a quick stop at Haight & Ashbury. The corner of Haight and Ashbury and its surrounding neighborhood is noted for its role as the center of the 1960's hippie movement and the Summer of Love of 1967.


Its not really a foodie stop, but hubby and I wanted to roam the streets where the likes of Janis Joplin, the Grateful Dead, and Jimi Hendrix once lived.


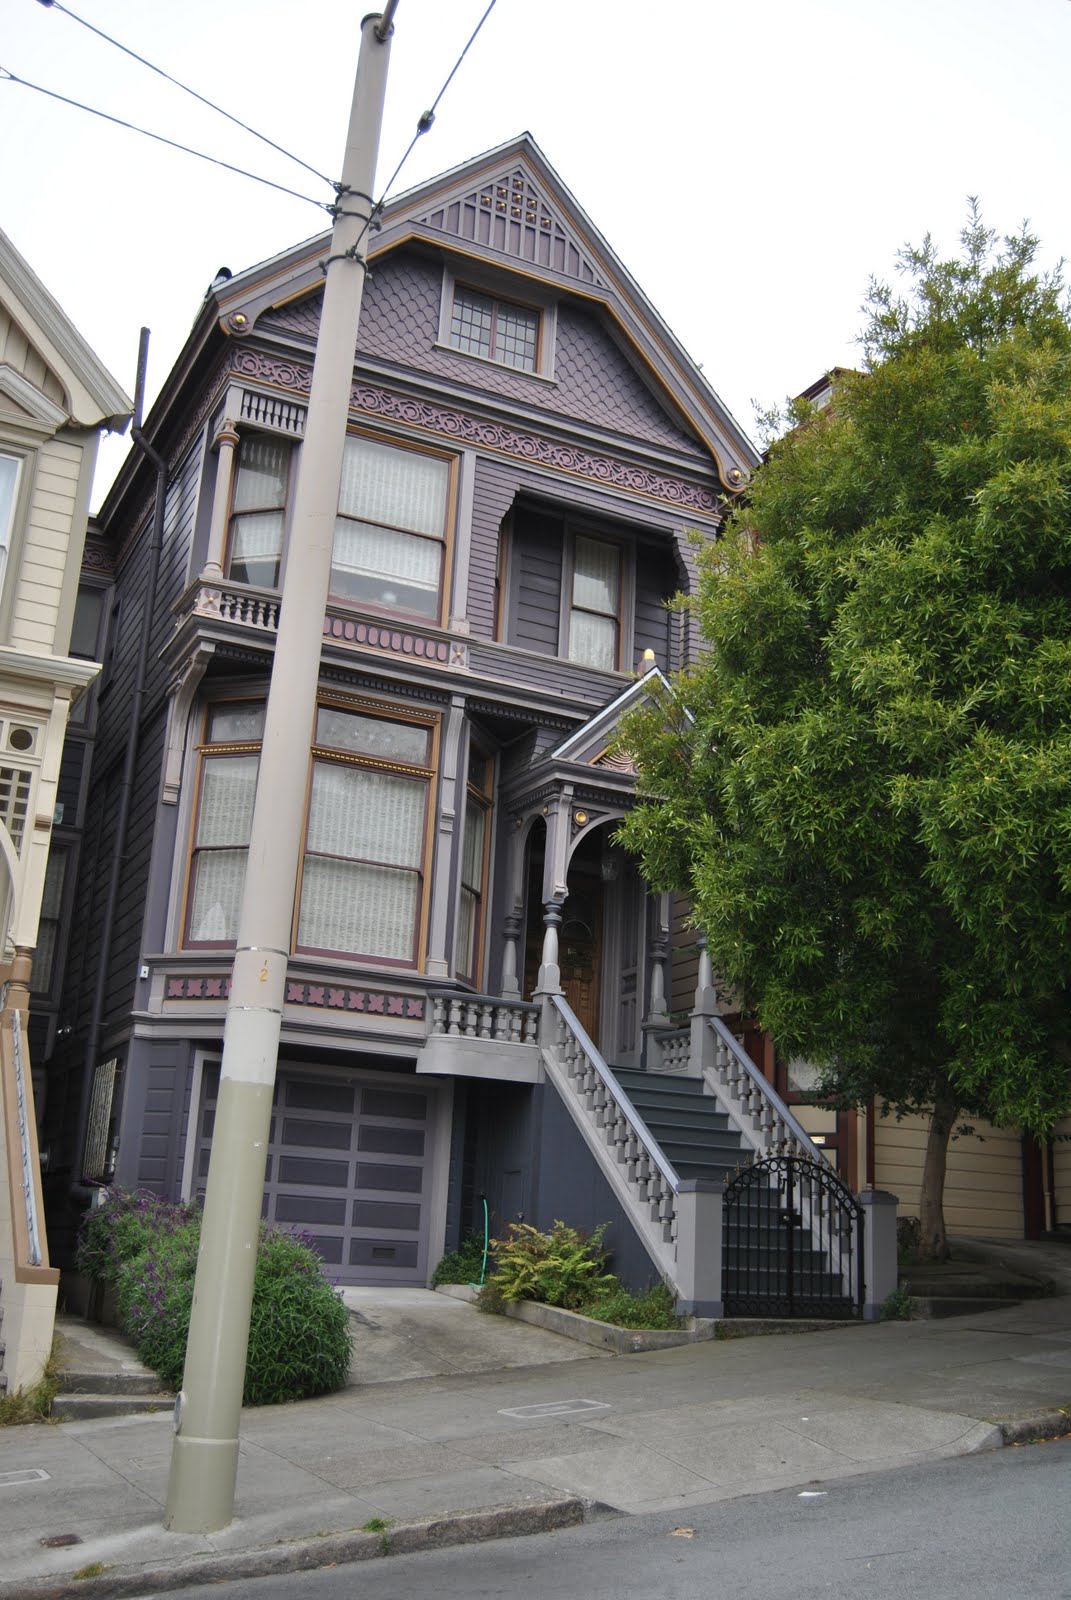
We even found the house where the Grateful Dead once lived.


We also came across some performing hippies, which you'll see a lot of around the neighborhood. Performers trying to make a living, hoping to get discovered by some record executive.


I would say that this particular trip to the Bay area was quite interesting. It was more full of history and food rather than a trip to a lot of the tourist traps. I wish we spent more time in these areas but we only had a day to explore the wonders of San Francisco. Until next year, San Francisco.