Showing posts with label Filipino dishes. Show all posts

Tuesday, March 20, 2012

Empanadas


Empanada is a pastry stuffed with a meat filling. Sometimes its stuffed with strictly vegetarian items. Sometimes, people tend to be creative and stuff sweet fillings in them. Empanadas are another one of those treats that have different versions from different cultures. And in each culture, are even more versions depending on the region. There are a variety of versions of Empanadas in the Philippines. I learned 3 different versions of Empanadas from 3 different aunts who happen to be sisters. Unfortunately, there are certain techniques that I hadn't mastered from those versions. Therefore, I haven't attempted to make them on my own. I like to make them with my aunts. Mostly because its quality time spent with them. But I do miss those homemade Empanadas. Store bought empanadas just doesn't have that flavor that I look for.

Sometime last week, this recipe for Empanadas came up from my reader from What's Cookin' Chicago? So I gave this one a try and its seems to be fail-proof. It was pretty easy and quite tasty. I might, however, try to bake these next time. The recipe calls for frying them, which is the traditional Filipino way of making them. But I don't eat as much fried foods as I used to. The dough in this recipe was really flaky and yummy. I'm hoping it'll be the same when I bake them next time.

Filling
2 Tbsp. oil
1 medium onion, minced
2 garlic cloves, minced
1 1/2 lb. ground meat (turkey, pork, chicken, or beef)
1 medium russet potato, diced
1/2 cup water
1/2 cup frozen peas
salt
pepper
3 hard boiled eggs

1) Heat oil in a large skillet over medium heat. Add onions and garlic and saute until softened.

2) Add ground meat. Cook until browned and no longer pink, making sure to break up large pieces.

3) Add potato and water. Continue to cook until potato has softened. Add peas and season with salt and pepper to taste. Remove from heat and drain excess liquid. Cool while making the crust.

Crust
3 cups flour
1/2 tsp. salt
1 cup cold butter, cut into small cubes
4 Tbsp. sugar
6 Tbsp. ice water
egg wash (1 egg yolk, whisked with 1 tsp. water)
oil for deep frying

1) In a large bowl, mix together flour, salt and sugar. Cut butter into the flour mixture using a pastry cutter or two knives. Make a well in the center and add ice water into the center. Mix with a fork until stiff.

2) Turn dough on a lightly floured surface. Knead dough until flour is completely incorporated and the dough is smooth. Wrap dough in plastic wrap and set aside for 30 minutes.

3) Divide dough into 20 pieces. Roll each piece of dough into a small ball on the palm of your hand. Using a rolling pin, roll out dough into a flat circle. Place 1 tablespoon of filling in the middle of the dough. Top with a wedge of hard boiled egg. Brush edge of dough with egg wash. Fold dough over filling and crimp edges to seal. Deep fry until golden brown. Serve hot.

Wednesday, February 29, 2012

La Paz Batchoy


La Paz Batchoy is a Filipino noodle soup that has its origins from La Paz, Iloilo City in the central area of the Philippines. I've never actually had La Paz Batchoy. The closest I've gotten to it was having the dehydrated version, where you add hot water. And it was pretty bad. So it doesn't count. But I knew that this dish would be good if I had the original version. So I decided to try to make it and see what it would actually taste like. After a quick search, I decided on this recipe from Filipino Recipes.

The original recipe required the use of pork chitlins and liver. Not a huge fan of either. So I omitted them and kept the chicken, pork meat, beef and shrimp. It also required a small amount of bagoong, which is a shrimp paste found in Asian markets and a staple in the Filipino kitchen. I don't know what a real La Paz Batchoy tastes like, but this one was pretty darn good. Its pretty time consuming because I had to boil beef and pork bones to make the broth. But once that's done, the preparation is pretty simple. And totally worth the wait.

1 lb. beef chuck
Pork bones
16 cups water
1 medium onion, quartered
1/2 head garlic, crushed (about 6-8 cloves)
1/2 tsp. shrimp paste (Bagoong)
1 Tbsp. peppercorns, crushed
2 Tbsp. Worcestershire sauce
1 Tbsp. sugar
1 tsp. soy sauce
salt to taste
1/4 lb. pork
1/4 lb shrimp
1 boneless, skinless chicken breast
ground chicharon, for garnish
fried/toasted garlic, for garnish
chopped green onions, for garnish
fresh Chinese egg noodles

1) In a large stock pot, boil beef chuck and pork bones with 16 cups of water for 2 hours, or until the beef is tender. Occasionally skim off the sludge that forms on the surface of the water. Drain the broth. You should have about 12-14 cups of broth. Discard pork bones. Cut beef into thin slices and set aside.

2) Return broth on the stove over medium heat. Add onion, garlic, shrimp paste, peppercorns, Worcestershire sauce, sugar, soy sauce, and salt to taste. Bring to a boil. Blanch shrimp until pink. Remove from broth. Remove shell and head from shrimp. Set aside.

3) Add pork and chicken into broth and continue to simmer until pork is tender, about 25-30 minutes. Add more water if necessary. Remove meats and allow to cool. Slice thinly and set aside.

4) Continue simmering broth over low heat until ready to serve. Place noodles in bowls and top with strained broth. Garnish with the sliced meats, chicharon, fried garlic, and green onions.

Tuesday, February 21, 2012

Beef Mechado


Its Fat Tuesday. The Tuesday before Ash Wednesday. Where Catholics decide to fatten up before fasting on Ash Wednesday. I was planning on cooking a small quick meal, because hubby decided to start his diet. But heck, why not join the masses and cook a big meal.

The next dish on my to-do list resulting from our last trip to the Philippines is Beef Mechado. We had lunch at the Aristocrat prior to our flight back home to the States and hubby absolutely loved the Beef Mechado. He asked me if I can try to make the dish. And you know me. Always up for a challenge when it comes to cooking. So I did a search which lead me to this recipe from my go-to blog, Panlasang Pinoy.

Beef Mechado is another Filipino tomato-based beef stew, like the Beef Caldereta, but cooked and seasoned slightly differently. I've modified the original recipe to use a crock pot so that the meat comes out a lot more tender. Because frankly, slow cooking over a stove top never yields the best results for me. But the crock pot does. And this dish came out really well. Hubby loved this dish. He even said he thinks it might be better than the Aristocrat.

3 Tbsp. oil
3 cloves garlic, crushed
1 large onion, sliced
2 lbs. beef chuck, cubed
8 ounce can tomato sauce
2 cups water
1/4 cup soy sauce
1/2 tsp. ground black pepper
1 slice of lemon
2 bay leaves
salt to taste
1 large potato, cubed

1) In a large saute pan, heat oil over medium-high heat. Saute garlic and onion. Add beef and cook until browned.

2) Place beef mixture in crock pot. Add tomato sauce, water, soy sauce, black pepper, lemon, bay leaves, and salt to taste. Slightly stir. Cook on low for 8-10 hours, or on high for 4-6 hours. Halfway through the cooking process, add potatoes and continue cooking until meat is tender and potatoes are soft. Serve with steamed rice.

Tuesday, February 7, 2012

Ukoy (Squash and Sweet Potato Fritters)


Ukoy is a Filipino crunchy appetizer, often eaten as a mid-afternoon snack. There are many variations to this dish, where shrimp and mung bean sprouts are sometimes used. But the main ingredient is always either sweet potato or squash or both. Growing up, I was not too fond of ukoy whenever my Lola (Grandmother) or dad made them. They made theirs with squash, mung bean sprouts, and tiny shrimps. As a kid, you never really like veggies or tiny little shrimps poking at you while you're eating it. But I've grown to love eating ukoy when I had them at a friend's party about a year ago, and then recently at my daughter's welcome party during our recent trip to the Philippines. My aunt's maid had made them for the party and I learned that my aunt taught her how to make them. And so I asked my aunt how it was made, which was quite simple. Her ukoy was made of just sweet potato and squash, a little salt and pepper to taste, and a mixture of cornstarch and flour to bind them together. There really isn't any exact measurements. So its more based on texture. You can also add whatever type of other vegetable you want. I added some corn kernels for an extra touch of sweetness. Once deep fried, the best part of this dish is the crunchiness that I love. Dip them in a mixture of vinegar with minced garlic, salt and pepper, this can be eaten as a main dish as well. My daughter loves this dish so she's able to have her dose of veggies for the day.

2 cup shredded kubocha squash (Japanese Squash)
2 cup shredded sweet potato
1/2 cup corn kernels
salt & pepper to taste
1/2 cup cornstarch
1/2 cup flour
splash of water
oil for deep frying

1) Fill  a deep frying pan or saute pan with oil about 1/4 of the way up the pan. Heat oil over medium heat.

2) In a large bowl, combine shredded squash, sweet potato, salt and pepper. Stir until incorporated. Add cornstarch, flour, and splash of water. Stir well. Mixture should stick together when mashed together. If mixture is too wet, add an equal amount of cornstarch and flour. If its too dry, add a splash of water.

3) Spoon mixture into oil to make a small patty and fry on both sides until golden brown. Serve hot with a mixture of vinegar with minced garlic, salt and pepper.

Monday, February 6, 2012

Chicken Inasal (Filipino-style BBQ Chicken)


I've been missing the Philippines lately. Missing the families we left behind, missing the laid-back atmosphere, missing the food. I made a vow during my last post to try to replicate some of the great dishes we had during our recent trip. The first dish I wanted to attempt was Chicken Inasal, and the recipe I decided on was from Panlasang Pinoy, my go-to blog for all things Filipino.

Assembling was a cinch, but grilling was pretty tricky because you have to baste the chicken in a butter mixture. And everyone knows (but I happened to have forgotten) that oil and flame do not mix. So I charred some of the chicken. However, I was able to peel off the charred skin (because skin is too fattening anyway. ha!) and ended up with a delicious grilled chicken. Not quite the same as Bacolod Chicken Inasal that I had in the Philippines, but I think it'll do for now.

2 lbs. chicken, cut into serving pieces

Marinade
2 Tbsp. minced ginger
2 Tbsp. minced garlic
3/4 cup chopped lemon grass
1 cup coconut vinegar (or substitute with cider vinegar)
1/2 cup lemon juice
1 Tbsp. salt
1/4 cup brown sugar
1 cup lemon-lime soda
1/2 Tbsp. ground black pepper

Basting sauce
3 Tbsp. annatto oil (annatto seeds cooked in oil)
1/2 cup butter, melted
1/4 tsp. salt
1 tsp. lemon juice

1) In a freezer bag or large bowl, combine chicken with all the ingredients for the marinade. Stir or shake ingredients until well incorporated. Allow to marinade in the refrigerator for at least 1 hour or up to overnight.

2) When ready, heat grill. While grill is heating, combine ingredients for the basting sauce in a medium bowl. Set aside.

3) Grill chicken while basting with generous amounts of basting sauce. Continue grilling until juices run clear. Serve with steam rice and dip chicken in a mixture of soy sauce and a splash of lemon juice.

Wednesday, February 1, 2012

Trip to the Mother Land - Philippines 2012


You've probably noticed that I've been incognito for the past month. Two weeks of that was spent packing and preparing for our recent trip to my homeland, the Philippines. The last two weeks was the vacation itself. And since I haven't posted in a while, this is a fair warning that this post will be a little long.

When I was single, trips to the Philippines was a yearly thing with my family. The last time I went back home was in 2005, when I brought the new hubby to our homeland. His first visit to the Philippines. Ever. Actually, he went there when he was 3 months old, but he said it didn't count since he didn't remember anything. Since then, we've had our ups and downs, then our daughter was born, and then we decided to put everything on hold until hubby finished school and found a job. My relatives have been asking and wondering when they would finally be able to meet our daughter. We wanted to take her to the Philippines before she started Kindergarten, which will be next year. So I figured now would be a good time to take her. Along with my parents and siblings, we headed back home.

We arrived in Manila at the Ninoy Aquino International Airport (NAIA) on a very early Sunday morning. We were then taken on a 2-hour drive to our house in the province of Nueva Ecija, north of the big city of Manila, where we were welcomed by many relatives. I was then told that one of my aunts will be hosting a Welcome Party for our daughter the following day. So we rested up to prepare for the festivities the following day.

The food was being catered. So there wasn't much preparation on our end, except to shower and get dolled up. We were able to watch the set-up of all the delicious foods. Especially the set up of the Roast Pig. No Filipino feast is ever complete without the the Roast Pig, or Lechon. Its similar to the Hawaiian Kalua Pig, except the skin is this yummy, crunchy goodness that is deliciously dangerous to eat. Can you just hear the arteries clogging up?

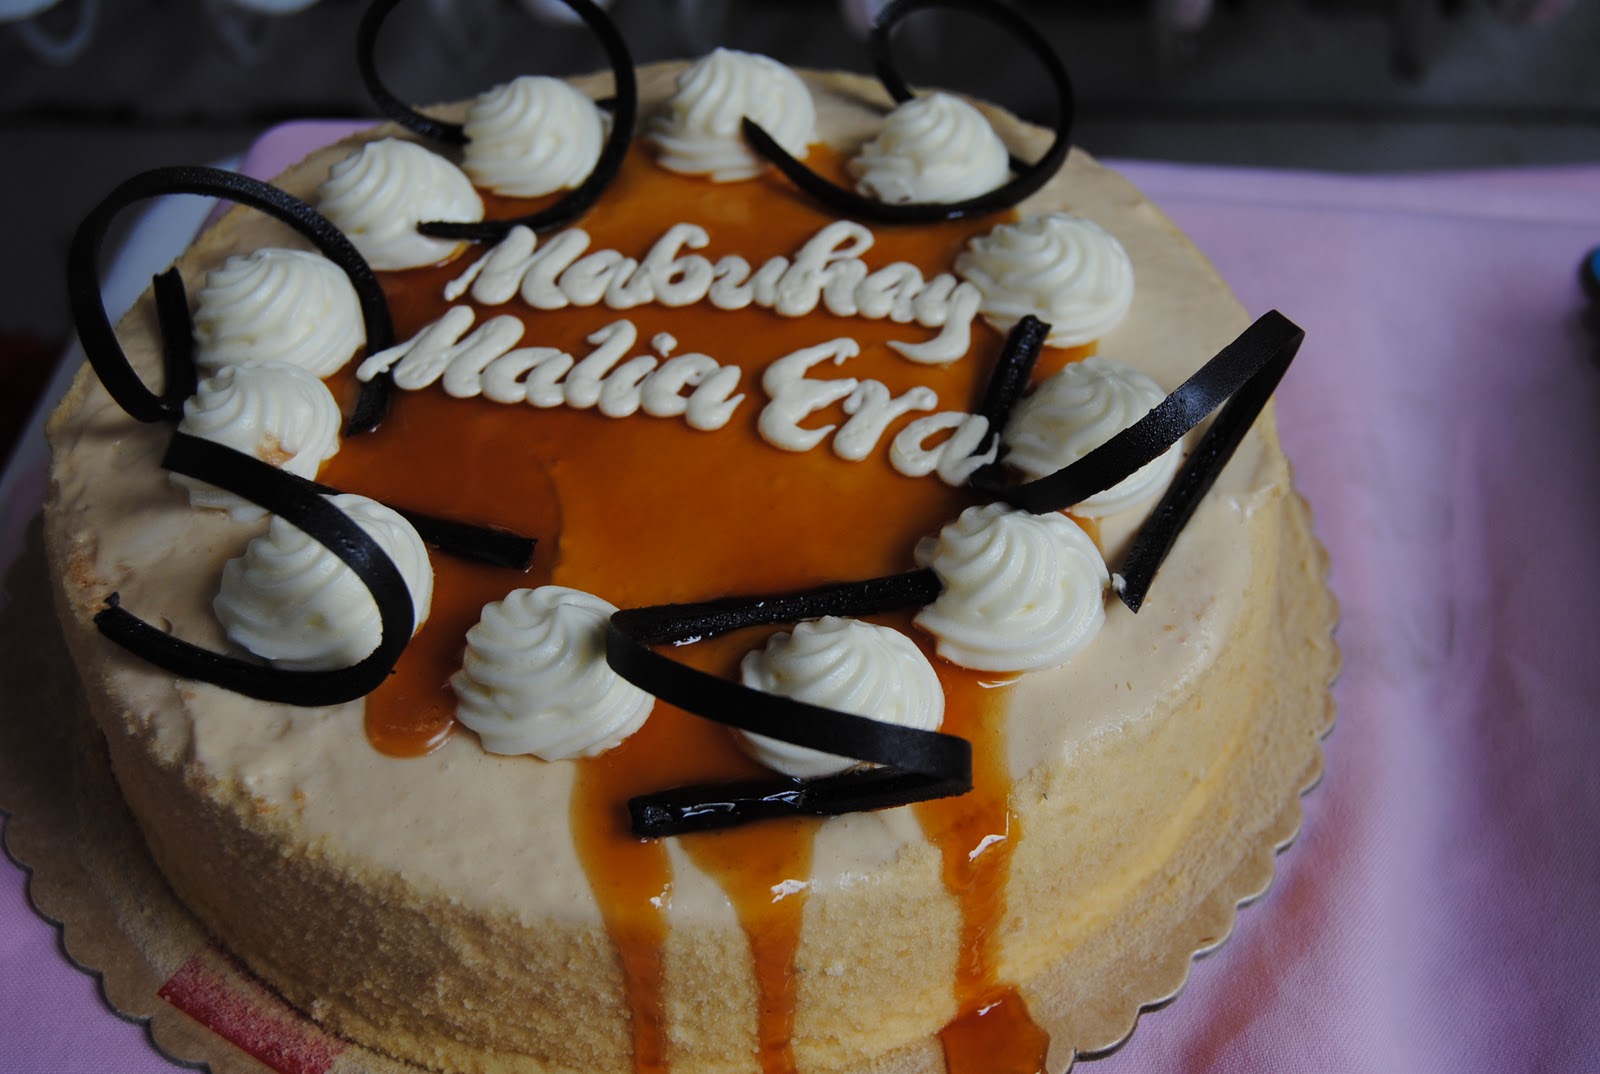
My brother and sister decided to purchase some cakes for the festivities, since it was also my parents' anniversary, and it didn't look like we had any desserts on the table.

My daughter's cake was this yummy Dulce De Leche cake, with its cake so soft and airy, I couldn't stop eating it.

The next day, we had to wake up really early to drive back to Manila and spend the night at the Marriott in the Resort World Manila because we had an early flight heading to the island of Boracay.

And yes, that is the bathroom on the other side of that see-thru wall.


Prior to our trip, I had been reading up on what restaurants to visit at the Resort World and the Red Crab Alimango House caught my eye.

Specializing in, what else, crabs, I ordered the Crab Maritess which was a huge crab, sauteed in lots of garlic. Messy but delicious.

Of course, I had to order something for our daughter, and she loves nothing more than pasta. So we ordered their seafood pasta.

My meal is never complete without the rice. So I also ordered the Crab and Shrimp Fried rice, which was also delicious.

We turned in early after dinner and got ready for our early flight to Boracay the next day. I didn't realize how long of a journey it would take to finally get to Boracay: a 45 minute plane ride from Manila to the Kalibo airport, then a 2-hour drive to the jetty port, a 15-minute boat ride to the docks of Boracay, and finally a 10-minute cab ride to our hotel. By the end of it all, we were exhausted and hungry and it was lunch time.

After checking into our room and exploring the hotel, we decided to walk down the beach path, crowded with tourists/foreigners, vendors advertising their business of a beach activity (island hopping, scuba diving, helmet diving, ATV, Zip Line, etc.), and lots of restaurants. We decided to have a quick lunch and headed to Don Vitto's, an Italian restaurant at the Boracay Mandarin Island Resort.

When entering the restaurant, I was a little confused. I thought we had entered a Chinese restaurant with its Chinese decor. I soon realized that it was decorated as such because of the theme of the hotel. Looking beyond the decor, we decided to order our lunch.

Everyone knows how much I love spaghetti, and so its what I ordered.

We also ordered a Meat Lover's pizza, which didn't look too meaty. But we were hungry and we were in a rush to finish lunch because hubby and I had a spa appointment. So we basically engulfed the pizza.

After our quick lunch, hubby and I headed to our couples massage. So relaxing. However, later in the evening, I soon regretted ordering my plate of spaghetti because I had a serious case of food poisoning that lasted 24 hours. It ruined my trip as I stayed in the hotel room the next day. With no energy and an empty stomach, I managed to get out of the room and took a stroll on the beach to view this Boracay sunset:
                            

This was probably the best part of my island trip.

The following day, we had a breakfast buffet. Everyone ate breakfast while I ate dry bread, for fear that my stomach problems would return. We walked around the beach some more before we packed it up for another long journey back to Manila: 10 minute cab ride to the jetty port, 15 minute boat ride, a 2 hour drive back to the Kalibo airport, then the 45 minute plane ride. And to finally get back to our house in Nueva Ecija, we took another 2 hour drive home. I don't know if the trip to Boracay was worth all this. But at least I can say that I've been to Boracay.

We spent a couple of days at our house before heading further North to my mom's province of Pangasinan. Every visit to Pangasinan always begins with a visit to the shrine of Our Lady of Manaoag to say a prayer of thanks for the many blessings we have received. Once finished at the church, we visited one of our aunts and stayed for the night.

Back to Nueva Ecija we went and spent a couple of nights before heading back to Manila to prepare for our return to the states. During those 2 days, we managed to take hubby on a quick tour to historical sites such Intramuros, which housed Fort Santiago where the Filipino National Hero, Dr. Jose Rizal was imprisoned. We also managed to do some shopping in the many, many malls that the city had.

We stayed at Crown Plaza Galleria which was connected to the Robinson's Galleria Mall. Before entering the hotel, I saw the sign for Bonchon Chicken, said to be the best chicken in America. A Korean Fried Chicken. I actually did see them being featured on one of the shows on either the Food Network or Cooking Channel TV. Unfortunately, there isn't a branch near us here in Southern California. So I was really excited to try them out.

However, I was very disappointed, in fact quite upset, with their service because they were very slow. Aside from their famous chicken, we also ordered the Bulgogi beef plate, which we were warned would take 15 minutes. We had no problem with that. But it took almost 45 minutes to get our order. Keep in mind that we ordered before the lunch rush. When the lunch rush came, our order kept being pushed back and I observed patrons who came after us being served with their food.

In all fairness, their chicken was delicious. Its a fried chicken drenched in a sweet and sour sauce. Even with the sauce, the chicken remained crunchy. It might actually have been worth the wait. At another branch.


Ever since we arrived in Manila, we always saw signs and billboards advertising Mang Inasal Restaurants. And so my brother and I had been dying to try an Chicken Inasal. However, because we were down to our last days in the Philippines, we settled for another restaurant in the mall that featured Chicken Inasal, Bacolod Inasal Chicken.

I ordered a Pork BBQ stick.


And shared my daughter's plate of Chicken Inasal. Dipped in a mixture of soy sauce and the local lemon/lime fruit, Calamansi, the chicken was delicious. The BBQ stick wasn't bad either.
                           

We had visited a few other restaurants such as Max's Restaurant, which we have here in the states, and The Aristocrat Restaurant which my dad and I always love to go to for their Pancit Canton. Unfortunately, I had forgotten my camera during those visits. And we ordered a lot of food from them.

Overall, I had a wonderful culinary experience, as always. I always love eating foods that are not served here in the states. So I often miss real, authentic Filipino meals. I especially miss meals prepared by aunts and uncles at home. Those are always the best. Aside from delicious foods, its always great seeing family we haven't seen in a while. So my goal for the next few months is to try to re-create some of the meals I've had during our trip. We'll see how they compare.

Tuesday, August 23, 2011

Prawns in Coconut Milk & Crab Fat (Sugpo sa Aligue at Gata)


I stumbled across 80 Breakfasts from Delish. I came to learn that this blog was not really all about breakfast, but also featured Filipino dishes. I've been trying to get back to my roots in trying to cook more Filipino foods, so I really scored when I discovered this new blog.

As I skimmed through the recipes, I found this one that somehow looked familiar. Not something my Lola would make, but more in the realms of what my dad's side of the family would make. I remember my aunts serving crab fat as a side dish when we ate fresh seafood. Or using coconut milk on any dish to make it more rich. Both of which made the food sooooo delicious, but fattening at the same time. With that said, caution must taken when eating this dish as it contains both coconut milk and crab fat. I'm fortunate enough to have several local Filipino stores in the area that sells crab fat. Otherwise I don't know where else I would be able to buy it.

This dish was oh so delicious. It takes me back to the times when all of my dad's side of the family would visit our aunt's for a holiday or a vacation and they would cook all these wonderful foods for our huge family. Its a comforting feeling. However, I decided to have only one serving of this dish. The rest is going to my parents' place for them to try it out. Too much of a good thing can be bad.

2 lbs. fresh shrimp, unpeeled and head on
4 Tbsp. oil
1 Tbsp. garlic, minced
1 Tbsp. fresh ginger, minced
1 medium onion, chopped
1/2 tsp. red chili flakes (more if you like it spicier)
1 cup crab fat (aligue)
1 cup coconut milk (gata)
1-2 Tbsp. fish sauce (according to taste)
juice of half a lemon or 1 whole lime

1) In a large skillet, heat oil over medium high heat. Add garlic, ginger and onion. Saute until onions have softened.

2) Add chili flakes and crab fat. Cook, stirring often until the crab fat softens and the oil separates. Stir in coconut milk and continue to cook until well blended. Add lemon/lime juice.

3) Add shrimp into the pan and stir to coat. Adjust seasoning by adding more fish sauce and/or lemon/lime juice to balance the sour and saltiness of the sauce. Simmer for 5 minutes or until shrimps have all turned pink. Remove from heat and serve with steamed white rice.

Monday, August 8, 2011

Banana-Cue


All of the Filipino dishes I make in this blog are reminiscent of my childhood days in the old country. This recipe is one of them. Banana-Cue is a street food often sold as an afternoon snack. I remember numerous stands of food vendors selling their specialties outside the gates of my elementary school, ready to sell their goodies to hungry students after a long day of school. Many of the food stands sold sweets, such as banana cue. My parents rarely allowed us to buy street food for sanitary reasons. They always feared that I would get sick by the way some vendors prepared their food. I guess that's one of the reasons I chose my career in food safety. But when we managed to convince my parents to buy us an afternoon snack, we were often treated to banana cue.

Filipinos have a strange way of naming their foods. Our Filipino barbecue is usually served on a stick. Therefore, everything else served on a stick always ended with a "cue." Hence the name "banana-cue." Its made of a saba banana that is only found in the Philippines. Saba is mainly a cooking banana and is one of the most important banana variety in Philippine cuisine. We're lucky enough to have an abundance of them in our local Filipino grocery store. And when I saw them during my recent trip to the Filipino store, I decided it was time to introduce this yummy snack to hubby and my daughter.

3 ripened saba banana (make sure its not over-riped), cut into 4 pieces
3/4 cups brown sugar
3 Tbsp. oil

1) Heat oil over medium-low heat. Add banana pieces and cook until they start to brown on all sides, about 3-5 minutes.

2) Stir in brown sugar. Continue cooking until sugar begins to melt, stirring occasionally. Once sugar has completely melted, continue stirring until all banana pieces have been coated with the sugar. Remove banana pieces and place on a plate lined with parchment or wax paper. Cool slightly, about 5 minutes. Serve threaded on a wooden skewer.

Saturday, July 2, 2011

Atchara (Pickled Green Papaya)


Growing up, my lola used to make a lot of pickled items such as pickled mangos and pickled green papaya relish (atchara). She would bottle them and it would remain in the fridge for months and months. They're often an accompaniment to fried dishes with rice. However, I was never a huge fan of the pickled mangos or atchara. I was a kid and didn't like the sour-ness of them. Then a few months ago, hubby and I went to a food truck fest and ate off of a Filipino food truck. They had the standard rice and tocino. But their plates had a side of atchara with it. I don't think I remember my grandparents or my parents eat their tocino with atchara before. Then flashbacks of me not liking atchara when I was kid ran through my mind. But hey, I'm older now and have a more sophisticated palette. So I gave it a shot and ate it together with my rice and tocino. What did I miss all these years??? The sour-ness balances the flavors of the meat and rice perfectly. Hubby took a taste of it and asked if I could make atchara. And it gave me an idea. So I did a search and found this recipe from Panlasang Pinoy.

One of the reasons why I started this blog was for my daughter to have a record of her culture in food. With all the desserts and other non-Filipino dishes I make on this blog, sometimes I lose that vision. So this atchara dish somehow takes us back to that. And when I tasted my final product, it somehow took me back to my days with my lola.

3-4 lbs. green papaya, juliennned
2 medium sized carrots, julienned
1 large onion, sliced thin
10 cloves garlic, sliced thin
2 Tbsp. peppercorn
1 inch fresh ginger, julienned
1/4 cup, plus 1 1/4 tsp. salt
2 cups white vinegar
1 1/3 cups sugar
2 small boxes raisin (optional)

1) In a large bowl, combine green papaya and 1/4 cup salt. Mix until salt is well distributed. Cover and refrigerate overnight.

2) After papaya has been treated, place in a colander and thoroughly rinse under running water. Wrap rinsed papaya with a cheesecloth or clean cloth towel. Squeeze as much liquid as you can out of the papaya.

3) Return papaya in the large bowl. Add carrots, garlic, ginger, onions, peppercorns, and raisins (if using). Mix until evenly distributed. Place in a large, clean mason jar (or evenly distribute among several smaller mason jars). Set aside.

4) In a medium saucepan, add vinegar and cook over medium heat and bring to a boil. Stir in sugar and remaining 1 1/4 teaspoon of salt until well diluted. Remove from heat and cool completely.

5) Pour vinegar mixture in the prepared mason jars until the vegetables are completely submerged. Seal jar and refrigerate for 5 days to 1 week. Serve with fried dishes as desired.

Monday, June 20, 2011

Chicken Afritada (Filipino Chicken Stew)


There are a few staple dishes in the Filipino kitchen. There's Adobo, Tinola, Beef Caldereta, Pancit and other popular dishes that frequent many Filipino meals. Another one of those dishes is Chicken Afritada. Its a similar tomato sauce-based stew like Caldereta. Hubby happens to really like both stews, but I have yet to make Afritada for him. This is another one of those dishes that I never had a chance to get the recipe for from my Lola. But mom also made kick-a$$ Afritada. Whenever she had time to cook. Mom was usually the workaholic, and so dad did most of the cooking when I was growing up. However, a quick call to mom this evening gave me a few tips on how to make it. With those tips, I was able to find this recipe, from Panlasang Pinoy. I realize that there are different ways to make Afritada when I found various versions of this dish. But this dish came out really well and hubby thought it was quite tasty. I'm so glad to have finally found a recipe for Afritada. I won't have to use the powdered version anymore.

4 Tbsp. oil
4 cloves garlic, minced
1 medium onion, diced
2 lbs. chicken pieces (wings and things)
4 hot dogs, cut into large pieces (optional)
1 large potato, cubed
1 large carrot, cut into large pieces
1 bell pepper, cut into strips
1 cup frozen green peas
1 cup tomato sauce
1 1/4 cups chicken broth
2 bay leaves
1 tsp. sugar
salt & pepper to taste

1) Heat oil in a large pot over medium heat. Pan fry chicken until lightly browned (about 3 minutes on each side). Remove from heat and set aside.

2) Saute garlic and onions in the same oil until fragrant. Add hot dogs (if using) and return chicken. Cook for about a minute. Pour in tomato sauce and chicken broth. Add bay leaves. Cover and simmer for 30-40 minutes.

3) Add potatoes and carrots and continue to simmer for another 7 minutes, or until vegetables have softened. Add bell pepper, peas, sugar, and salt & pepper to taste. Continue to simmer for another 3-5 minutes, or until the remaining vegetables have softened. Serve with white rice.

Saturday, March 26, 2011

Custard Cake


Custard cake is a Filipino dessert made of a chiffon cake topped with Flan. Its one of my favorite desserts. I haven't had this in a long time and I miss eating it. One of my aunts used to own a restaurant and she would come over and bring us some custard cake whenever we had family functions at my parents' house. They no longer own the restaurant and we don't see her as often anymore, so its been quite a while since I've had custard cake.

One day, I decided to do a search for a custard cake recipe and found quite a few versions. Some made out of boxed cake mixes, most made from scratch. But I decided to settle with this recipe from Panlasang Pinoy, a website dedicated to Filipino cuisine. Its quite complex recipe, with 3 things going on: the caramel syrup, the flan, and then the cake. But organize your ingredients and it should be pretty simple and so worth all the preparation.

Flan
1 1/4 cup sugar
6 eggs
1 can sweetened condensed milk
1 cup milk

1) In a small saucepan, heat 1 cup of sugar over medium heat. Do not mix sugar until the end, when sugar is almost all brown. Pour caramel in a 9 x 13 pan and evenly spread on the bottom and allow to harden like candy. Set aside.

2) In a small bowl, combine 1/4 cup sugar, eggs, condensed milk and milk. Mix well. Pour over hardened caramel. Set aside while making the cake.

Cake
1 1/2 cups cake flour
1 tsp. baking powder
6 egg yolks
1/2 cup sugar
1/4 cup milk, mixed with 1/4 cup water
1 tsp. grated lemon peel

6 egg whites
1/2 tsp. cream of tartar
1/2 cup sugar

1) Preheat oven to 350 deg F.

2) Sift together cake flour and baking powder. Set aside.

3) In a medium bowl, beat egg yolks then gradually add 1/2 cup of sugar. Continue beating for another 2 minutes. Add 1/3 of the flour mixture and beat until well incorporated. Add 1/2 of the milk/water mixture. Add another 1/3 of the flour mixture and then the other half of the milk mixture. Beat until incorporated and add the final 1/3 of the flour mixture. Add grated lemon peel. Set aside.

4) In a mixer bowl, beat egg whites on high speed for about 1 minute. Add cream of tartar and continue beating for 3-4 minutes. Gradually add 1/2 cup of sugar and beat until stiff peaks form.

5) Fold meringue into batter until well incorporated.

6) Pour 6-8 cups of hot water in a roasting pan. Place a rack in the roasting pan, and then place the prepared pan on top of the rack. Bake for 60 minutes, until toothpick test comes out clean.
Remove cake from the roasting pan cool completely. Invert cake on a serving tray and refrigerate at least an hour before serving.

Wednesday, March 16, 2011

Chop Suey


My daughter has come to love baby corn. In fact, whenever we order anything that has baby corn in it, she'll just pick them out of the dish and all she would eat is the baby corn. Seems like its the only vegetable she'll voluntarily eat. So it gave me the idea to make chop suey at home so that she can have more of her baby corn.

This is a similar recipe to my Pancit Canton, but without the noodles. We don't often eat vegetable dishes, so this was a nice change of pace from our regular pasta or rice dishes. You can practically use any type of vegetable you'd like in this dish. I've made this a few times before and learned the recipe from my dad. After serving this to my daughter, I almost forgot that she also loves eating the quail eggs in this dish.

3 Tbsp. oil
1 cup sliced, cooked chicken
2 cloves garlic, minced
1 small onion, cut into large chunks
1/4 tsp. black pepper
1 Tbsp. soy sauce
1/2 tsp. salt
1 cup chicken broth
1 Tbsp. cornstarch
10 pieces snow peas, sliced in half
1 medium carrot, sliced thin on a bias
1 cup celery
1 (14 0z can) baby corn
1 cup chopped cabbage
1 (14 oz can) quail eggs

1) Heat oil in a wok or skillet over medium-high heat. Add garlic and onion and cook until fragrant, about 1 minute. Add chicken and continue to stir until heated through.

2) Add soy sauce, black pepper, salt and chicken broth and bring to a boil. Stir in all vegetables except the cabbage. Cook for about 3 minutes. Adjust seasoning to taste.

3) Reserve 1/4 cup of the liquid and add cornstarch into the liquid to make a slurry. Return cornstarch mixture into the the pan to help thicken the liquid. Once the sauce thickens, stir in cabbage and quail eggs and continue to cook until cabbage is almost done. Serve hot over steamed rice.

Sunday, March 13, 2011

Sotanghon (Filipino Rice Noodle Soup)


This is one of those comfort foods my dad used to make often. Especially when we were sick with a cold. Or if he wanted to make a quick meal for us, because this is a very simple recipe. I haven't made any Filipino dishes in a while and was craving Sotanghon, so I decided to make some for dinner tonight. Just like dad, I make this often when I want to make a quick, hot meal. This is one of my daughters favorite Filipino dishes.

1 boneless, skinless chicken breast (boiled and shredded)
6 0z package rice noodles (soaked in warm water for 8 minutes then drained)
1/2 onion, chopped
2 cloves garlic, minced
2 inch long fresh ginger, julienned
2 quarts chicken broth
1 Tbsp. annato oil (optional for color)
salt & pepper to taste
1 Tbsp. vegetable oil

1) Heat oil in a pot. Add onion, garlic and ginger. Cook until fragrant, about 1-2 minutes. Add shredded chicken and cook for another minute. Season with salt and pepper. Stir in annato oil if using)

2) Add chicken broth and heat until it begins to boil. Add noodles and continue to simmer until noodles are cooked through, about 2 minutes. Serve hot in bowls.

Tuesday, October 12, 2010

Kare Kare (Filipino Oxtail Stew)


My favorite Filipino dish is Kare Kare. Its a peanut butter-based oxtail stew that I never knew how to make from scratch. For years, I've always been using the powdered stuff, and so has my dad. My grandmother, however, made it from scratch. But, again, I never got the recipe. Hubby took a liking to Kare Kare, too, when I started making it for him. But he's only had the powdered version. My cousin, Jhune, is a great cook who told me that making Kare Kare from scratch required the use of grounded toasted rice. So I found this recipe that calls for the toasted rice. Surprisingly, it was pretty easy. The hardest part was grounding up the toasted rice. My food processor didn't ground it up finely, so I had to finish it off with my mortar and pestle. Otherwise this dish came out really well.

3-5 lbs. oxtail
5 Tbsp. cooking oil
5 cloves garlic, crushed
1 medium onion, sliced
1/4 cup annato seed water
1/4 lb. Chinese Long Beans, cut into 2-inch slices
1/2 lb. bok choy, stemmed
1/3 cup uncooked rice, toasted brown and ground to a powder
1/2 cup peanut butter, dissolved in 3/4 cup water
salt & pepper to taste

1) In a large pot, place oxtail and enough water to cover the meat. Boil for an hour. Discard water and rinse cooked meat. Place meat back in the pot and fill again with water enough to cover meat. Boil until tender.

2) In a sautee pan, heat oil and add onion and garlic. Cook until onion is softened. Add annatto water, garlic and onion to meat and return to boil. Add vegetables, powdered rice, and peanut butter mixture. Season with salt and pepper. Continue to boil until sauce slightly thickens. Serve with rice.


***You can also cook this dish in a crockpot by mixing all the ingredients together (except the vegetables) after the first boil of the meat. Place the whole mixture in a crockpot and cook it for 10 hours.

Monday, September 20, 2010

Ube Cake


I asked hubby what kind of cake he wanted me to make. I had him choose from either a Custard Cake or Ube Cake. Both of which are new recipes that I found and that I'll be trying for the first time. He chose ube cake.


Its suppose to be a 2-layer cake, but because I wasn't too happy with the frosting, I decided to use 1 layer for this particular frosting and the other layer will be used later when I try a different frosting. Maybe a swiss meringue type of frosting. We'll see. The flavors of this cake was quite good. The consistency wasn't as good. Hubby enjoyed it otherwise

2 1/2 cups cake flour
3 tsp. baking powder
1 tsp. salt
1 cup grated ube (purple yam)
3/4 cup milk
1 tsp. vanilla extract
1/2 cup light corn syrup
7 egg yolks, lightly beaten
1/2 cup vegetable oil
7 egg whites
1 tsp. cream of tartar
1 cup sugar
6 drops red food coloring
6 drops blue food coloring

1 cup sweetened condensed milk
2 sticks butter, softened
purple food coloring

1) Preheat oven to 325 deg F. Line 2 - 9 inch pans with parchment/wax paper.

2) In a medium bowl, mix together flour, baking powder and salt. Set aside

3) In a large bowl, combine milk and 1 tsp. vanilla. Add ube and blend until smooth. Blend in corn syrup, egg yolks, and oil. Beat in flour mixture until smooth. Set aside.

4) In a separate large mixing bowl, beat egg whites with cream of tartar until it starts to foam. Gradually add sugar and red & blue food coloring, continuing to beat until stiff peaks form. Fold in 1/3 egg whites into ube batter. Then fold in the remaining egg whites and continue folding until no streaks remain. Pour batter into prepared pans.

5) Bake for 35-45 minutes until the center of the cake bounces back when lightly touched. Cool completely before frosting.

6) To make the frosting, beat butter until it becomes light in color and fluffy. Beat in condensed milk and purple food coloring and blend until smooth. Continue adding food coloring until you reach the desired shade. If the frosting is too soft or wet, refrigerate until it hardens enough to frost the cake.

Monday, August 30, 2010

Beef Caldereta


Caldereta is a popular Filipino beef stew. There are different kinds of beef stews found in Filipino cuisine, but this is the most common one found in most Filipino kitchens. This is made with either beef or goat meat, which I don't really eat nor is it readily accessible.

Caldereta is one of hubby's favorite Filipino dishes, so it was really a mission of mine to find the right recipe to 'wow' him. This is my first attempt at making Beef Caldereta from scratch. I've always made caldereta using the seasoning packet found at the Filipino stores and am never happy with it. It just doesn't taste as good as the homemade version. It always tastes like it came out of a box. So I vowed not to make Caldereta anymore until I find a tried and true recipe.

My mom and lola used to make Caldereta when I was kid and they would add pan de sal in the stew. Unfortunately, I never learned the recipe from my lola. I asked my mom to teach me her recipe, and she briefly told me to make sure to add liver spread. So I found this recipe that called for liver spread. I modified the recipe a bit. The meat didn't come out as tender as I'd like it to be, but I think it would be perfect if I cooked it in the crockpot for 8-10 hours. I think I'll do that next time. All in all, it came out very tasty. Just the right flavor I was looking for. Now THAT'S Caldereta. We'll have to see if hubby approves of this. He's at school this evening and won't be tasting this until lunch tomorrow. So we'll see what he says.

4 lbs. beef stew meat
1 (8 oz) can liver spread or ground liver
1 large onion, minced
5 cloves garlic, minced
4 medium tomatoes, diced
2 (8 oz) cans tomato sauce
2 green bell peppers, sliced into strips
2 red bell peppers sliced into strips
2 hot chili peppers, minced
3/4 cup shredded cheddar cheese
3/4 cup spanish olives (optional)
2 medium potatoes, peeled and cut into large chunks
2 medium carrots, peeled and cut into large chunks
2 cups water or beef broth
1/4 cup oil
salt to taste

1) Heat oil in a stock pot on medium heat. Add onions and garlic and cook for a minute. Add tomatoes, red and green peppers and chili peppers. Cook for another minutes.

2) Add beef, tomato sauce, liver spread, and water or broth. Season with salt to taste. Simmer for 1 - 2 hours until meat is tender. After cooking for 1/2 hour, add potatoes and carrots and continue to simmer.

3) Add cheese and olives and continue to cook until sauce thickens. Serve with white rice.

Sunday, August 22, 2010

Ube Cake Roll


For those who've been following me and know me, I'm a huge fan of fusion food trucks. I haven't had a taste of their foods yet, but The Manila Machine is one that I'd also like to try. They have Ube cupcakes as one of their desserts. What a great idea!

Ube, also known as purple yam, is like a sweet potato and is used in many filipino desserts. Ube cakes are one of my favorite filipino desserts. So when I heard about ube cupcakes, I thought it was a great idea to try to make something like that. But before venturing into the cupcake version, I wanted to try making an ube cake roll using the base for my Pumpkin Cake Roll.

Its pretty much the same concept as the pumpkin cake roll, except ube doesn't have cinnamon, so I eliminated that. The flavor was quite good, but I was a little unhappy with how the color turned out. It didn't have the bright purple color that I was accustomed to in ube cakes. It came out more brown that anything. I may have to adjust the food color a little bit more. But I'll definitely make another attempt to make this and improve the recipe.

3 eggs
1 cup white sugar
2/3 cup ube puree (fresh or frozen)
3/4 cup all-purpose flour
1 teaspoon baking soda
12 drops red food coloring
12 drops blue food coloring
confectioners' sugar for dusting

1 cup confectioners' sugar
3/4 teaspoon vanilla extract
2 tablespoons butter, softened
8 ounces cream cheese
Directions

1) Preheat oven to 375 degrees F. Grease a 15x10x1 inch baking pan and line with parchment paper. Grease and flour the paper.

2) In a large bowl, beat eggs on high for five minutes. Gradually add white sugar, ube and food coloring. Add flour and baking soda. Spread batter evenly in pan. Bake for 15 minutes or until cake springs back when lightly touched.

3) Immediately turn out onto a linen towel dusted with confectioners sugar. Peel off paper and roll cake up in the towel, starting with the short end. Cool.

4) To Make Filling: Mix confectioners sugar, vanilla, butter or margarine, and cream cheese together till smooth.

5) Carefully unroll the cake. Spread filling over cake to within 1 inch of edges. Roll up again. Cover and chill until serving. Dust with additional confectioners' sugar, if desired.


Filipino-style Fried Chicken


Hubby, daughter and I are having a lazy Sunday today. When we have lazy Sundays, I usually prepare good meals. For breakfast, I made chocolate chip pancakes and banana pancakes using my pancake recipe. Then lunchtime came and I couldn't figure out what to make. Our lime tree is growing some good limes and I have some chicken wings in the fridge. hmmmm...... I haven't made Filipino fried chicken yet, so why not make it.

My dad has been telling me how my daughter loves his Filipino fried chicken. And mine didn't fail today and Hubby really liked it too. Its a really simple dish to make. I used lime on this dish because I had some, but you can definitely use lemon as well. This is definitely going to make rounds more often.

1-2 lb. chicken wings
1/4 cup lime juice (or lemon juice)
1/4 cup soy sauce

1) Place wings in a freezer bag or bowl. In a small bowl, combine lime juice and soy sauce and pour over chicken. Marinate for 1-2 hours.

2) Remove chicken from marinade and pat dry. In a pan, heat 3/4 cup oil on low-medium heat. Fry chicken for 3-4 minutes on each side. Serve with rice.

Wednesday, August 11, 2010

Leche Flan


We're having a breakfast potluck at work tomorrow and I was asked to make a Flan. "Flan for breakfast??? Whatever tickles your fancy!" Flan is a custard that has a Hispanic origin. That being said, it found its way into Philippine cuisine and became Leche Flan.

Leche Flan is a popular Filipino dessert that frequents itself in many Filipino functions. I see it so often that I don't have a need to crave for it. This is actually my mom's recipe and is quite easy. Its a super rich dessert, unlike other flans I've had. And it was a hit at the breakfast.

8 egg yolks
1 (12 oz) can evaporated milk
1 can condensed milk
1 tsp. vanilla extract
3/4 cup sugar

1) Preheat oven to 400 deg. F.

2) Combine all ingredients, except sugar, in a bowl and mix with a wire whisk until well blended. Set aside.

3) In a medium saucepan, heat sugar on medium heat until it browns and becomes a syrup (note: do not mix sugar until the very end, where the sugar is almost completely brown). Pour syrup in a 9-inch round pan and evenly spread on the bottom. Cool to harden like candy.

4) Strain egg mixture into prepared pan with syrup. Slowly place pan in a roasting pan, large enough to fit the prepared pan. Fill the roasting pan with warm water, about half way up the prepared pan. Bake for 1 - 1 1/2 hours.

The flan is done when you place a toothpick in the center and it comes out clean. Cool completely and invert on a serving tray when ready to serve.


Sunday, August 23, 2009

Pancit Canton

As a lot of people probably already know, my daughter loves pastas and noodles. So when I was at the Filipino store the other day, I decided to buy the ingredients for Pancit Canton to make for her. Pancit Canton is the Filipino version of the Chinese Chow Mein. Its another staple in the Filipino kitchen. Its so common at many Filipino functions. I hadn't felt the need to make it myself because I ate so much of it at other people's places or at restaurants. And I'm somewhat of a Pancit Canton "snob." There's a certain way it has to be prepared, and a certain taste that I look for. Aristorcrat, one of my favorite restaurants in Manila, makes the best Pancit Canton. Its one of my favorites. I don't think I've ever had anything that can compare. Therefore, I have never really attempted to make it myself, for fear that it might not come out as good as I like it. Until now.

Again, I would normally use the powder stuff, but I found a recipe I wanted to try out. Its a pretty simple recipe and it came out pretty good. Its not as good as Aristocrat's, but it'll do. Hubby and daughter loved it, so I'll definitely make it again.

3 Tbsp. oil
1 cup sliced chicken
1 Tbsp. fish sauce
1 Tbsp. cornstarch
2 cloves garlic, minced
1/2 medium onion, chopped
1/4 tsp. black pepper
1/2 Tbsp. soy sauce
1/2 tsp. salt
1 cup chicken broth
10 pieces snow peas, sliced in half
1/2 medium carrot, sliced
1 cup cabbage, chopped
1 cup sliced celery
1 can mushrooms
1 package canton noodles

1) Sprinkle fish sauce and cornstarch over chicken and thoroughly coat. Set aside.

2) Heat oil in a wok. Add garlic and onions and sautee for about a minute, making sure not to burn the garlic. Add chicken mixture and cook until it is no longer pink.

3) Add soy sauce, black pepper, salt and chicken broth and bring to a boil. Add snow peas, carrots, and celery. Cook for about 3 minutes. Adjust the seasoning to your taste and add cabbage. Cook until cabbage is almost done.

4) Add the Canton noodles. Stir until noodles are done and most of the broth has been absorbed. Serve hot.