Thursday, December 23, 2010

Chocolate Peppermint Cupcakes


The flavors of chocolate and peppermint seems to be an acquired taste. I happen to love the blending of chocolate and mint together. Its so festive. So when I came across this recipe from Beantown Baker, I decided to try this recipe out to serve as one of our desserts for our Christmas celebrations.

The cake came out so moist and delicious. And coupled with the minty fresh frosting made it a perfect combination. It wasn't that huge of a hit as the Red Velvet Cupcakes I made, but like I said, its an acquired taste. So those who liked chocolate peppermint loved them. Hubby and I did.

Cake
2 cups all purpose flour
2 cups sugar
3/4 cup cocoa
2 tsp. baking soda
1 tsp. baking powder
1/2 tsp. salt
2 eggs
1 cup brewed coffee, chilled
1 cup milk
1/2 cup vegetable oil
2 tsp. vinegar

1) Preheat oven to 350 deg F. Line muffin pans with muffin cups.

2) In a large bowl, combine flour, sugar, cocoa, baking powder, baking soda, and salt. Make a well in the center and add eggs, coffee, milk, vegetable oil, and vinegar. Mix until smooth (batter will be thin). Evenly distribute batter in muffin cups. Bake for 22 minutes, until toothpick inserted comes out clean. Completely cool before frosting.


Mint Swiss Meringue Buttercream frosting
4 egg whites
1 1/4 cup sugar
1 cup (2 sticks) unsalted butter at room temperature
2 tsp. peppermint extract
1/2 tsp. vanilla extract

1) Place egg whites and sugar in a double boiler pan and whisk until incorporated. Cook over simmering water, whisking constantly until sugar has dissolved and mixture is warm (approximately 160 deg F). Remove from heat.

2) Beat egg white mixture on high until it forms stiff peaks, about 8 minutes.

3) Turn mixture to medium-low and add butter several tablespoons at a time, beating well after each addition.

4) Reduce speed to low and add peppermint extract and vanilla extract. Beat for 2 minutes.

(note: if the frosting is still runny or soupy by the end of the preparation, refrigerate frosting for 30 minutes to 1 hour to stiffen the frosting so that it is easily spreadable).

Wednesday, December 22, 2010

Red Velvet Cupcakes


2 more days until Christmas! Yipee!!!

Christmas is my FAVORITE holiday. Spending time with family, gift-giving, eating, and being merry. That's what Christmas is all about. With our family, Christmas is a two-day affair. Christmas Eve, or Noche Buena, is the eve when we await the arrival of Christ. So its a huge celebration at my parents's house with lots of food and opening presents. Christmas day is spent at our house with my in-laws and we do it all over again with alot more food.

With that said, preparations have to start early. This year I decided to make a few desserts, one with this recipe from Beantown Baker for Red Velvet Cupcakes. I have another Red Velvet Cake recipe that I usually turn to, but realized, after trying other Red Velvet Cakes or cupcakes, that mine seemed a bit dry. I did make a batch of my original Red Velvet cake recipe to make Bon-Bons as well.

The first batch I made of this recipe today came out dry and somewhat chewy. So I trashed a whole batch. What a disaster. Luckily I had enough time and ingredients to make another batch. Then I realized that I had used regular all-purpose flour in the first batch instead of the cake flour it called for. So I made the 2nd batch correctly and it came out so perfect and so moist. I think I may have found a new red velvet cake recipe.

Cake
2 1/2 cups cake flour
1 1/2 cups sugar
1 tsp. baking soda
1 Tbsp. cocoa powder
1 tsp. salt
2 eggs
1 1/2 cups vegetable oil
1 cup buttermilk
2 Tbsp. (1 oz bottle) red food coloring
1 tsp. vanilla
1 tsp. white distilled vinegar

1) Preheat oven to 350 deg F. Line muffin pans with muffin cups.

2) Sift together flour, sugar, baking soda, cocoa, and salt into a medium bowl. Beat eggs, oil, buttermilk, food coloring, vanilla, and vinegar in a large bowl with an electric mixer until well combined.

3)Add dry ingredients to wet ingredients and beat until smooth, about 2 minutes. Bake for 25-30 minutes until toothpick inserted comes out clean. Frost with Brown Sugar Cream Cheese frosting (recipe below)


Brown Sugar Cream Cheese frosting
1 1/2 cups butter, softened
8 oz cream cheese, softened
1/4 cup light brown sugar, packed
1 tsp. vanilla extract
pinch of salt
4-6 cups powdered sugar
2-4 Tbsp. milk, depending on consistency

1) Cream the cream cheese with an electric mixer for about 1 minute. Add butter and beat for 1-2 minutes, until well incorporated.

2) Add brown sugar, salt, and vanilla extract and beat until well incorporated.

3) Slowly add 2 cups of powdered sugar and beat well. Continue adding powdered sugar and alternating with the milk until desired consistency.

Tuesday, December 21, 2010

Lomi Lomi Salmon


With the weather being so dark and gloomy lately, it sometimes makes me miss the islands. I once saw a Food Network chef make some Lomi Lomi Salmon one day, and it inspired me to try to make it too. I was at Costco the other day and found some salmon and thought now was the time to try to make this delicacy often found at all Hawaiian luaus and as a side dish to many Hawaiian meals.

"Lomi Lomi" means to massage. This is a 2-step recipe that requires you to massage fresh salmon with salt and marinate it overnight. But if you don't have the luxury of doing it overnight, you can probably use some smoked salmon. I used Hawaiian salt in this recipe, but you can probably use regular table salt, as Hawaiian salt is quite pungent. Otherwise this dish came out pretty good. And very salty. But that's how most Hawaiian dishes are like. This won hubby's approval.

1 lb. fresh salmon
1/4 - 1/2 cup Hawaiian salt (or sea salt)
6 tomatoes, diced
1 medium onion, finely chopped
1/2 cup chopped green onions
Hawaiian salt to taste

1) Massage salt all over the salmon. Place on a flat tray, cover, and refrigerate overnight.

2) Rinse salmon and soak for at least an hour, changing the water several times.

3) Shred salmon with your hands. Add tomatoes, onions and more salt to taste. Massage ingredients with your hands until ingredients are broken up and thoroughly mixed. Chill before serving.

Monday, December 20, 2010

Herbed Turkey Meatballs with Cranberry Sauce


I came across this recipe from Annie's Eats and it got me missing Thanksgiving. With Christmas Day fast approaching, I'm starting to feel a little bummed that the holidays would soon be over. So I decided to make this today to somehow take me back to a month ago, Thanksgiving. Because after today, I'll be starting my Christmas preparations.

This dish gave me all the flavors of Thanksgiving, without the hassle and stress of preparing a full Thanksgiving meal. This will definitely be my go-to meal when I crave a Thanksgiving meal.

1 Tbsp. butter
1/3 cup onions, finely chopped
1/3 cup celery, finely chopped
1 lb. ground turkey
1 cup breadcrumbs
1 large egg
2 tsp. minced thyme
2 tsp. fresh parsley
1/2 tsp. minced rosemary
1/4 tsp. dried oregano
1/2 tsp. poultry seasoning
1/2 tsp. salt
1/4 tsp. black pepper
cranberry sauce

1) Preheat oven to 425 deg F and lightly grease a baking sheet or line with parchment paper.

2) Melt butter in a small skillet over medium-high heat. Add onion and celery and cook just until softened, about 4-5 minutes. Remove from heat and set aside to cool slightly.

3) In a large mixing bowl, mix together celery/onion mixture with the remaining ingredients (except cranberry sauce) until well combined. Form the mixture into evenly sized balls, about 1 1/2 inches in diameter. Place meatballs, evenly spaced, on prepared baking sheet. Bake for 10-15 minutes until thoroughly cooked. Serve warm with Cranberry Sauce and mashed potatoes.

Sunday, December 19, 2010

Broccoli Cheddar Soup


Its the last weekend before Christmas and its been raining for the past 3 days. We had planned a trip to Disneyland and the rain has, for lack of a better word, dampened our plans. So we stayed local and have kept busy by attending one of my nephew's birthday party and did our last-minute Christmas shopping. I'm pooped, its rainy and cold, and I wanted to have something to warm me up inside.

Last week, our office had a holiday luncheon at BJ's Brewery. I had a half-sandwich and a bowl of Broccoli Cheddar soup. Yummy. I have large bags of broccoli and shredded cheese that I bought from Costco that I could use, so I searched for a good recipe for Broccoli Cheddar soup and found this recipe from CD Kitchen. I've never tried anything from Panera Bread, but this is a copycat recipe of their Broccoli Cheese soup. This was a yummy comfort food that I'll definitely be making again. Its a great way to have your vegetables for the day.

1 Tbsp. butter
1/2 of a medium onion, chopped
1/4 cup melted butter
1/4 all purpose flour
2 cups half-and-half (I used 1 cup milk and 1 cup cream)
2 cups chicken broth
1/2 lb. fresh broccoli
1 cup julienned carrots
salt and pepper to taste
1/4 tsp. nutmeg
8 oz shredded cheddar cheese

1) Melt 1 Tbsp. butter in a stockpot. Saute chopped onions for about 2 minutes. Set aside.

2) In the same pot, add melted butter. Whisk in flour to make a roux and cook for about 3 minutes, whisking constantly. Slowly add half-and-half. Add chicken broth. Simmer on medium-low for 20 minutes, whisking constantly.

3) Add onions, broccoli and carrots. Simmer on low heat for about 20 minutes, until the vegetables are tender. Season with salt and pepper.

4) Place mixture in a food processor or blender and puree (or you can use an immersion blender). Return mixture to the pot to heat. Add cheese and continue to cook on low heat until cheese has melted. Add nutmeg. Remove from heat and serve topped with more shredded cheese or croutons.


Saturday, December 18, 2010

Pumpkin Spice Pancakes


Its a chilly and rainy Saturday morning and we decided to stay in. And whenever we stay in, I like to make a nice breakfast for us.

I still had some pumpkin puree in the freezer that I wanted to use up. And then one day, I came across this recipe from Annie's Eats that I had been saving up and I thought today was a good day to try it out. What a great recipe this was. It very tasty and my daughter loved it. We served this with whipped topping, or pancake syrup, or cinnamon sugar. My daughter liked dipping her pancakes in the whipped topping the best. This is another great way to sneak in something healthy in my daughter's food.

1 1/4 cup all purpose flour
2 Tbsp. brown sugar
2 tsp. baking powder
1/4 tsp. salt
3/4 tsp. ground cinnamon
1/4 tsp. ground nutmeg
dash of ground ginger
dash of ground cloves
1 cup milk
1/2 cup pumpkin puree
1 large egg
2 Tbsp. vegetable oil or melted butter

1) In a medium mixing bowl, combine flour, brown sugar, baking powder, salt and all the spices. Stir to combine.

2) In a small bowl, combine milk, pumpkin puree, egg and oil/butter. Add mixture to dry ingredients and whisk until well incorporated (note: the batter will be a little lumpy).

3) Heat a greased skillet or pan. Pour batter on skillet and cook on both sides until golden brown. Serve warm with maple/pancake syrup, whipped topping, or cinnamon sugar.


Monday, December 13, 2010

Bobby Flay's Macaroni & Cheese Carbonara


I first saw this dish on the show Throwdown with Bobby Flay on the Food Network. It was a throw down to Macaroni and Cheese, and this was Bobby Flay's twist on the old classic. I love Pasta Carbonara. I have my own version of Carbonara that I make often when I want to cook a quick pasta. But since my daughter loves Mac & Cheese and I love Carbonara, this was a "must-make" recipe for me.

The original recipe called for all kinds of expensive cheeses such as Fontina and Asiago. Not readily accessible to me right now. I do, however, have a huge bag of mixed shredded cheese I bought from Costco that I always have on hand. The recipe also called for pancetta, but I used regular bacon instead and it came out awesome. Its a great way to spruce up regular macaroni and cheese.

butter to grease baking dish
1 Tbsp. olive oil
4-5 slices of bacon, diced
4 cloves garlic, finely chopped
3 Tbsp. all purpose flour
5 cups warm milk
4 large egg yolks, slightly whisked
1 tsp. dry thyme leaves
1/2 tsp. cayenne pepper
6 cups of shredded cheese (plus more for topping)
1/2 cup shredded Parmesan cheese (plus more for topping)
salt and pepper
1 lb. small pasta shells (such as elbow macaroni), cooked just to al dente
1/2 cup coarsely chopped parsley

1) Preheat oven to 375 deg F. Butter bottom and sides of a 10 x 10 baking dish. Set aside.

2) Heat oil in a large saute pan over medium heat. Add bacon and cook until golden brown on all sides. Remove from oil and place on a plate lined with paper towel to drain oil.

3) Add garlic to oil and cook just before it turns golden brown. Whisk in flour and cook for 1-2 minutes. Whisk in warm milk and raise heat to high, whisking constantly until it thickens, about 5 minutes.

4) Temper eggs by adding about 1/4 cup of the milk mixture with the eggs and whisk. Whisk egg mixture into remaining milk mixture. Continue whisking for 1-2 minutes. Remove from heat. Whisk in thyme leaves, cayenne and cheeses until melted. Season with salt and pepper. If the mixture is too thick, add more warm milk, 1/4 cup at a time.

5) In a large bowl, combine cooked pasta, cheese sauce, cooked bacon, and parsley. Transfer to prepared baking dish. Top with a mixture of cheeses. Bake for 12-15 minutes, until mixture is heated through and the top is a light golden brown.


Saturday, December 11, 2010

Early Christmas gift - a new kitchen tool


.....well, it isn't really a new kitchen tool, but its going to definitely be used in the kitchen when I photograph all my yummy dishes with it.

Hubby and I finally succumbed to the masses and bought a D-SLR camera as a Christmas present for each other this year. I've been dying to get one since forever (well, at least since my daughter was born and I started this blog 2 years ago). I look at so many blogs everyday that have photographs using a SLR camera and am always amazed at how alive they look. They definitely make a food photo look even more delicious.

This will definitely help me showcase my food even better. Because, honestly, I always struggle with the lighting in my house. I always try to find creative ways to give the dish better lighting. Especially since most of my cooking is done after work when I cook dinner and there is no longer any natural light from the sun. This will also be useful when taking our family portraits or shooting photographs of my daughter. We normally have my sister (who has a Nikon D90) be our family photographer. She has all the bells and whistles with her camera: Fisheye lens, heavy duty flash, etc. But its not always convenient for her to take time out of her busy schedule to photograph us.

This camera is a very basic SLR camera. Its not a D90 by any means. But its a good camera for beginners and amateurs such as myself. Hubby and I are still testing it out and trying to figure out what kinds of tricks it can do. One things for sure, though - we're definitely very excited to have this new addition to our tech gadgets and are looking forward to viewing the outcome.

Monday, December 6, 2010

White Chocolate Cranberry Orange Cookies


The holiday season is in full swing at our house. The Christmas tree is up, presents are under our tree, lights and lawn decorations are on our house. I LOVE CHRISTMAS!

To keep with the holiday spirit, I decided to make these cookies from the Betty Crocker website. The recipe called for fresh or frozen cranberries, but I decided to use dried cranberries instead and it came out really well. These were so delicious and very festive. The tartness of the cranberries and the sweetness of the white chocolate chips blend together so well. I think I may have found a new favorite cookie.

1/4 cup unsalted butter, softened
1/2 cup sugar
1/2 cup packed brown sugar
grated zest of 1 orange
1 egg
2 tsp. vanilla extract
1 1/2 cups all purpose flour
1/2 tsp. baking powder
1/2 tsp. baking soda
1/4 tsp. salt
1 cup cranberries (fresh, frozen, or dried)
1/2 cup white chocolate chips

1) Preheat oven to 350 deg F. Grease cookie sheets or line with parchment paper.

2) In a small bowl, sift together flour, baking powder, baking soda and salt. Set aside.

3) In a large bowl, beat together butter, sugar, brown sugar, and orange zest on medium speed until well blended. (The mixture will have a consistency of wet sand). Add egg and vanilla and beat until smooth.

4) Add flour mixture into egg mixture and stir by hand until almost combined. Add cranberries and white chocolate chips and stir just until blended.

5) Drop spoonfuls of dough, 1 inch apart, on prepared cookie sheet. Bake for 12-14 minutes until light golden and set around the edges but still soft in he middle. Cool on the cookie sheet for 1-2 minutes. Transfer to cooling rack to finish cooling.


Monday, November 29, 2010

Pasta Bravo


I was looking online for new recipes and came across
this one from The Piggly Wiggly that looked simple and delicious. We don't have a Bravo restaurant here in the West Coast, but they apparently have a dish there called the Pasta Bravo. This recipe only required 6 ingredients and 2 steps. However, if you make the chicken it calls for from scratch, it'll take more than 6 ingredients. I just pounded some chicken flat, seasoned with salt and pepper, then drenched it in flour and fried them. Or you can use ready-made chicken nuggets like she did in her recipe.

I had saved this recipe for a while now, because I haven't found the time to pick up some Alfredo Sauce from the Olive Garden. We had lunch there last week and I finally got to pick some up. The recipe emphasizes to use either homemade Alfredo sauce or buy some from Olive Garden. So that's just what I did. Then I picked up some Tomato & Basil Marinara and a jar of Roasted Red Pepper from Trader Joe's. Finally, I made this dish and it was as easy as 1-2-3. Make this and you'll definitely impress.


8 oz penne pasta (cooked according to package directions)
cooked chicken
1 Tbsp. butter
8 oz mushrooms, sliced
1 pint (2 cups) Alfredo Sauce
1 pint (2 cups) Marinara Sauce
7 ounces roasted red peppers

1) Melt butter in a saucepan and saute mushrooms until cooked. Set aside.

2) In a blender, combine Alfredo sauce, marinara sauce and red peppers. Blend until smooth. Pour in another saucepan and bring to a low boil. Remove from heat.

3) Assemble by placing pasta on the plate, topped with chicken, then mushrooms. Pour sauce on top and add shredded Parmesan cheese for garnish.

Friday, November 26, 2010

Thanksgiving Feast 2010


For the preparation of last year's Thanksgiving feast, I only had one day to prepare. I decided that that was too stressful to prepare a whole Thanksgiving meal by myself. So this year, I decided to take 2 days off from work to prepare. And I'm glad I did. It gave me plenty of time to clean the house, take out all the good china and serving platters, prepare the food so that all I had to do on the day of Thanksgiving was assemble everything together. I made myself an itinerary so that I can make sure I get everything done and not miss anything. I was much more organized this year and I think I executed it very well.


As usual, I made my now infamous Deep Fried Turkey and had the usual sides of Mashed Potatoes, my brother's favorite Scalloped Potatoes, Creamed Corn, and of course, Dressing on the side. This year, however, I decided to make the dressing with Sourdough bread rather than the cornbread that the recipe called for because not everyone liked the sweetness of the cornbread in the dressing. But the sourdough taste, I felt, overpowered the dressing. So next year, I'll use plain french bread. For dessert, I served another Buttermilk Pie and French Silk pie. My mom also brought her famous potato salad and ordered some Spam Musubi to top off the meal.

It was another successful Thanksgiving celebration, with lots to be thankful for again this year. I think my plan of action worked out well this year. I think I may have started a tradition of taking off 2 days from work. It made my preparations so much easier.


Thursday, November 25, 2010

Bobby's Hot Crab Dip


As a starter for this year's Thanksgiving dinner, I decided to make this dip. I watched Paula Deen and her son, Bobby, make this on her show on the Food Network. Hubby has a different kind of crab dip that has artichoke and uses imitation crab. What I like about this dip is the use of fresh crab. I omitted a few ingredients that made this dip too spicy, because I also wanted my daughter to have a chance to eat it as well. It came out quite tasty and creamy.

8 oz cream cheese, softened
1/2 cup mayonnaise
1 cup shredded pepper jack cheese
2 medium tomatoes, chopped
3 green onions, chopped
juice of 1 lime
1 lb. lump crab meat

1) Preheat oven to 350 deg F. Grease a casserole dish and set aside.

2) Using a mixer, combine cream cheese, mayonnaise, pepper jack cheese, tomatoes, green onions and lime juice. Carefully fold in crab meat. Bake for 30 minutes, until hot and bubbly. Serve with tortilla chips, pita chips, toasted baguette.

Buttermilk Pie


French Silk Pie


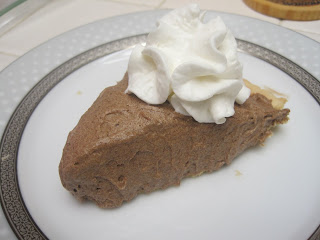
Every year, my brother would always buy his all-time favorite pie, French Silk pie, from Baker's Square for Thanksgiving dinner. Unfortunately, all the Baker's Square branches closed down here in Southern California. He was kind of bummed out about that. The other day, I came to learn that my friend Kiran was also addicted to the pie and so she did a search for the recipe to try to make it for their Thanksgiving dinner. I had this French Silk Pie recipe saved up from Beantown Baker and it gave me the idea to make it for my brother for Thanksgiving this year.


Wednesday, November 24, 2010

K's Punch


Aaaaah, Refreshing!

This is actually my friend, Kiran's, recipe that she had made up. How ingenious! I first had this refreshing beverage at her son's birthday party a few months ago. It was a perfect beverage to quench my thirst on that hot day. These aren't exact measurements. She just told me throw in a few ingredients together to my taste. So my measurements below reflect an average-sized pitcher to my taste. Of course, you can add more or use less of an ingredient to your liking as well. The recipe calls for a Berry Sangria, which can be bought at Olive Garden. Its a very concentrated liquid, so Kiran told me to put only a little of it in the drink.

I wanted to make this beverage for our Thanksgiving dinner tomorrow, so today was a trial run. And it came out quite tasty. Hubby really liked it. Another thing to note was that this drink didn't have a name. So I'm calling it "K's punch" - K for Kiran :) Thanks, dear friend.

3 Tbsp. Berry Sangria
3/4 cup pineapple juice
3/4 cup orange juice
Juice of 1 lime (or lemon)
lemon lime soda
ice cubes
slices of oranges, limes or lemons for garnish

1) Combine juices together in a pitcher. Fill the pitcher with lemon lime soda. Add ice cubes and slices of oranges, limes/lemons for garnish.


Thursday, November 18, 2010

Turkey Stock


We had our office Thanksgiving luncheon today. And I guess tradition (its only been the 2nd time) is for me to deep fry a turkey for the office. Like last year, my boss bought the turkey, and I went to my dad's (which is only 10 minutes away from the office) to deep fry it.


Last year, one of the staff took home the leftover bones from the turkey. She told me she would make soup out of it. What an awesome idea. So when we had Thanksgiving at home, I used the turkey bones to make my own batch of Turkey stock. This year, I took the turkey bones from the office to make some stock again. It freezes well for later use in soups and other dishes that require broth. Its a great way to use up all the turkey bones from your Thanksgiving dinner. And it smells so good!

1 Turkey carcass
3 sprigs of parsley (I didn't have any, so this was omitted)
2 medium onions, quartered
3 ribs celery, cut up
2 carrots, cut up
1 bay leaf
2 tsp. dry thyme leaves
2 tsp. salt
a dash of black pepper

1) Break up carcass and place in a large stockpot. Add remaining ingredients and fill with enough water to cover all the ingredients in the pot. Bring to a simmer over medium-low heat. Reduce heat to low and simmer for 3-4 hours. Cool slightly. Strain broth into a bowl. Refrigerate then remove fat from the top of the broth.

Wednesday, November 10, 2010

Pumpkin Soup II


Its a chilly autumn evening and I'm feeling like I want something to warm me up inside. Last week I had roasted a few of the pumpkins we bought for Halloween for later use. Tonight is the perfect time to use some of the pumpkin puree.

I found this recipe from the Food Network website that I wanted to try out because it looked pretty simple. Although I already had another Pumpkin Soup recipe, I felt it lacked a little umph. Something was missing. So when I tried this new recipe tonight, its just what I was looking for. Maybe its the spices I used in this one that was better. I modified the recipe by adding some brown sugar in it because I like my pumpkin soup to be a little more sweet. It was perfect. I think I'll be sticking with this one more.

2 cups fresh pumpkin puree
2 cups chicken broth
1 cup water
1/4 cup maple syrup (I used pancake syrup)
1/2 cup brown sugar
1 tsp. cinnamon
1/2 tsp. nutmeg
1/2 tsp. salt
1/2 tsp. ginger
1 cup heavy whipping cream
toasted pumpkin seeds for garnish

1) Place pumpkin, broth, water, syrup, brown sugar and spices in a saucepan and mix well. Heat on medium heat until it begins to boil. Remove from heat. Stir in cream until thoroughly incorporated. Serve in bowls, topped with toasted pumpkin seeds. (Note: you can also serve the soup by hollowing out a medium sized pumpkin and placing the soup in the pumpkin)


Monday, November 8, 2010

Easy Taco Pizza


We're going out to dinner tonight to celebrate my mom's birthday. Unfortunately, hubby will not be joining us because he has classes. An exam, too, for that matter. But I still have to cook something for him to bring for lunch tomorrow. This recipe popped up on the Yahoo website that I've been saving to use and I thought today would be a good day to make it. I made this for lunch, before my parents picked me and my daughter up in the afternoon. It tastes just like a taco on a pizza crust. And it was super easy to make. I omitted some of the ingredients it originally called for because I didn't have any (like the olives, but I don't really like olives). But I'll probably add it the next time I make it again. I think hubby will like this one.

prepared pizza dough
3/4 lb. ground beef or ground turkey
1 cup chopped onions
1 (8 oz) can tomato sauce
1 packet of taco seasoning
1 (2 1/4 oz) can pitted olives
2 cups shredded cheese (I used a Mexican cheese blend)
shredded lettuce
chopped tomatoes
diced avocados

1) Preheat oven to 425 deg F. Grease pizza pans or baking pans. Roll out dough and transfer to pans. Prick dough generously with a fork. Bake for 10-12 minutes.

2) In a large skillet, cook ground meat and onions until meat is browned and onion is tender. Drain off the fat. Stir in tomato sauce, olives (if using), and taco seasoning. Heat through.

3) Spread meat mixture over hot crust. Sprinkle cheese on top. Bake for another 10 minutes, until cheese melts. Serve, topped with tomatoes, lettuce, avocados, and additional shredded cheese. Top with a dollop of sour cream.

Tuesday, November 2, 2010

Louisiana Chicken Pasta


Another pasta dish I love at the Cheesecake Factory is the Louisiana Chicken Pasta. Creamy, crunchy, and a bit spicy makes a perfect combination. So I was stoked to come across this recipe from a blog I encountered, The Piggly Wiggly. Its a copycat to the Cheesecake Factory recipe and tastes just as awesome. Making this dish required a few steps, but it was pretty easy to make. I had most of the ingredients on hand, so I was really excited to try out this recipe for dinner tonight. I got a thumbs up from hubby, daughter, and you can also add my 2 thumbs up as well.

Sauce
1 Tbsp. butter
1 Tbsp. olive oil
1 small yellow bell pepper, chopped
1 small red bell pepper, chopped
3/4 of a small onion, chopped
3 cloves garlic, minced
1 tsp. red pepper flakes
2 1/2 cups heavy whipping cream
1 cup chicken broth
4 Tbsp. fresh basil, thinly sliced
1 cup grated Parmesan cheese
salt and pepper to taste
12 oz package pasta, cooked according to instructions

Chicken
4-6 boneless, skinless chicken breast
creole seasoning
1 1/2 cup panko breadcrumbs
4 Tbsp. all purpose flour
1/2 cup grated Parmesan cheese
1 cup milk
4 Tbsp. vegetable oil

1) To prepare the sauce: Melt butter and olive oil in a large skillet over medium heat. Add bell peppers and onion and cook for about 4 minutes.

2) Add garlic and crushed red pepper and cook for about 3 minutes.

3) Add cream and chicken stock. Simmer sauce until it slightly thickens, about 5 minutes.

4) Add basil and Parmesan cheese. Stir until thoroughly incorporated. Season with salt and pepper. Reduce heat to low and continue to simmer until sauce is reduced and thickened (approximately the amount of time it takes to cook the chicken)

5) To prepare the chicken: Season chicken with creole seasoning. Pound the chicken until thin.

6) Combine breadcrumbs, flour and Parmesan cheese in a deep dish. Place milk in another deep dish.

7) Dip flattened chicken in bread crumbs, then in the milk, and back in the breadcrumbs.

8) Heat oil in a frying pan to medium-high and cook chicken on each side until golden brown. Drain chicken on a paper towel and keep warm.

9) Add cream sauce to the pasta and toss to coat. Serve on a platter and place chicken on top of the pasta. Top with additional Parmesan cheese if desired.

Sunday, October 31, 2010

Vanilla Bean Cupcakes


I've been meaning to make some Vanilla Bean cupcakes for a while now. Its Halloween and we'll be spending it at my parents' place so I decided to make some sweet treats. I've bookmarked quite a few different recipes for Vanilla Bean cupcakes and decided to try this one from Telly's Tasty Tidbits. I also used her Vanilla Bean Frosting recipe.

These cupcakes came out quite tasty. To be a little more festive, I decided to add some orange coloring on the cupcakes and also had fun by making these creepy looking cupcakes:


Vampire and Eyeball cupcakes. I got these ideas from Annie's Eats and were so much fun to make and eat.

For the cupcakes:
2 1/2 cups all purpose flour
2 tsp. baking powder
1/2 tsp. baking soda
1/2 tsp. salt
1/2 cup milk
1/2 cup vegetable oil
1 tsp. vanilla extract
1 vanilla bean pod, cut lengthwise
1 stick unsalted butter, softened
1 cup sugar
3 large eggs

For the frosting:
2 1/2 sticks unsalted butter, softened
2 1/2 cups confectioner's sugar
1 vanilla bean pod, cut lengthwise
pinch salt
1 tsp. vanilla extract
2 Tbsp. heavy whipping cream

1) Preheat oven to 350 deg F. Line muffin tin with 24 muffin cups.

2) In a medium bowl, whisk together flour, baking powder, baking soda and salt. Set aside.

3) In a small bowl, combine milk, oil and vanilla extract. Scrape the inside of the vanilla bean pod into the bowl. Set aside.

4) In a large bowl, cream together butter and sugar until light and fluffy. Add eggs one at a time, beating well after each addition.
Add 1/3 of the flour mixture and combine just until blended. Add 1/2 of the milk mixture and combine just until blended. Continue adding flour and then milk mixtures alternately until they're used up. Mix thoroughly.

5) Fill prepared cupcake liners about 2/3 full. Bake for 15-18 minutes or until toothpick test comes out clean (note: start checking for at the 10 minute mark to prevent from over-baking, or else it will become too dry). Cool completely and frost with Vanilla Bean frosting.

6) To make the frosting: Beat butter on medium-high until smooth, about 20 seconds. Scrape seeds from vanilla pod into butter and beat on medium-high speed for about 15 seconds to combine.
Add confectioner's sugar, salt and vanilla extract. Beat on medium-low until most of the sugar is moistened. Scrape the sides of the bowl and continue beating until mixture is fully incorporated. Add whipping cream and beat on medium-high until it becomes light and fluffy.
Frost prepared cupcakes.


Monday, October 25, 2010

Mexican Cornbread Skillet Pie


One of my co-workers, Stacy, was talking about making some kind of a tamale pie she wanted to make because she had bought some Marie Callender's cornbread mix from Costco she wanted to use. I told her I had a lot leftover, too, and thought it was a great idea. I remembered that I had bookmarked this recipe from another favorite blog I frequent, Sing for your Supper.... so I wanted to finally make this.

The dish came out okay, if you like cornbread that much. I don't know if I would make this one again, unless its requested. Maybe if I tweak it a bit, I'll take a liking to it. Though hubby loved it. I'll probably make it again on request.

boxed cornbread mix
small can of green chillies (optional)
corn kernels
2 cloves garlic, minced
1 medium onion, chopped
1 red bell pepper, chopped
2 cans diced tomatoes
1 lb. ground turkey
1 tsp. cumin
1 tsp. chili powder
1 tsp. black pepper
1 tsp. salt
a dash cayenne pepper
1 cup shredded cheese

1) Preheat oven to 350 deg F. Prepare cornbread mix according to package directions. Add green chillies and corn. Set aside.

2) In a medium pan, saute onions, garlic and bell peppers over medium-high heat until soft. Add ground turkey until cooked through. Drain off grease. Stir in cumin, chili powder, black pepper, salt and cayenne pepper. Remove from heat.

3) Grease bottom of a cast-iron skillet (or any oven-safe skillet or pan) and sprinkle the bottom with a little cornmeal. Evenly spread half of the cornbread mixture and top with the meat mixture. Top with shredded cheese, then spread with the remaining cornbread mixture over the top. Bake for 45-50 minutes, or until golden brown.

Friday, October 22, 2010

First Annual Valley Food Truck Festival @WhollyRollers

Its Friday night. What to do, what to do?

I've been dying to go to a food truck festival that have been popping up all over the Los Angeles County area lately. Unfortunately they are all too far away. Enter the First Annual Valley Food Truck Festival. Finally a food truck festival in my own backyard.

So where do I start??? Hubby, daughter, bro, sis and I had a plan of action. We each had to try out a different truck so that we can try different types of food.


My brother, of course, went for the White Rabbit truck. His favorite. I actually heard about this event from the White Rabbit truck website.


They advertised that they were going to feature their limited Red Velvet Flan. Sounds interesting. So my brother bought us some to try. Its a red velvet cake topped with flan. Its a spin-off to a Filipino dessert called the Custard cake, which I had been planning on making sometime next week. I guess this will get me in the mood to get cracking on making the custard cake.


The Red Velvet Flan was pretty good. Very sweet. I think I was the only one who really liked it. Everyone else could do without it.

My sister decided to try Tapa Boy, another Filipino truck. Unlike White Rabbit, which is a Filipino fusion truck, Tapa Boy serves traditional Filipino breakfast such as Tapsilog, Tosilog, Longsilog.


My sister decided to buy a variety of food from them. Her main meal was Tosilog, which was Tocino with a side of fried rice topped with a fried egg, a side of tomato salad and atsara (a green papaya salad). She also bought Tocino wrap and a Spam wrap, which is a spin-off to a sushi wrap. For dessert, she had different versions of a Turon, which are banana spring rolls.


Though the food was pretty good, I don't think I would pay over $6 for a Tosilog when I can get the same for about half that price at a local Filipino restaurant. I guess the convenience of Filipino food in a lunch truck is what you pay for. But its definitely not the food you pay for.

Hubby and I couldn't really decide on what to eat. Actually, it was I who couldn't decide. Hubby wanted some pastrami, and so I tagged along and went to The Place, which specializes in Pastrami.


Hubby had their Pastrami burger. I had The Place Burrito, which was a burrito with pastrami, hot dog and chili. Very heavy for my taste. So I only ate about a quarter of my burrito. I actually wanted, what I later found out to be, their Pastrami with egg burrito. Oh well. We also had a side of spicy carne asada french fries. The only bad part about our fries was that they didn't give us a fork to eat it with. Otherwise it was pretty good, and spicy.


Hubby wanted something cold and sweet on this chilly evening. So we decided to give Tango Mango Italian Ice a try.


We ordered a combination of Mango and Pineapple ice. My daughter loved it. Even though it was too cold for Italian Ice.


I was a little disappointed that The Border Grill truck didn't open for business, though their truck was there. The advertisement for this event also indicated that Cupcakes a Go Go was going to be at the event, but they weren't. So I was totally bummed about that too. I guess that's why I couldn't decide where to eat because I had my taste buds set for those trucks specifically. Well, I hope to see them at another food truck festival, if I'll even want them again.

Sunday, October 17, 2010

Peanut Butter & Jelly Bars


I haven't had a peanut butter and jelly sandwich in a long time. I remember back in grade school when the thing to eat was a pb&j sandwich for lunch. I've been craving for some peanut buttery goodness lately and I remembered that I had bookmarked this recipe from one of my favorite blogs, Beantown Baker. I had some leftover Strawberry Jam that I made and LOTS of peanut butter. So I decided to try to make this. And boy did this hit the spot. It sure brings back memories of days eating lunch at the school yard.

2 sticks unsalted butter, at room temperature
1 1/2 cups sugar
1 tsp. vanilla extract
3 eggs, at room temperature
2 cups creamy peanut butter
3 cups all purpose flour
1 tsp. baking powder
1 1/2 tsp. salt
1 1/2 cups (18 oz) jam
2/3 cups salted peanuts, coarsely chopped

1) Preheat oven to 350 deg F. Grease a 9x13 inch pan. Line it with parchment paper, then grease and flour the pan. Set aside.

2) In a small bowl, sift together flour, baking powder and salt. Set aside.

3) In a large bowl, cream together butter and sugar on medium speed until light yellow, about 2 minutes. Turn mixer down to low speed and add vanilla, eggs, and peanut butter. Mix until ingredients are combined. Slowly add flour mixture into peanut butter mixture and mix until well combined.

4) Spread 2/3 of the dough evenly into prepared pan. Spread jam evenly on top of the dough. Drop small globs of the remaining dough evenly on top of jam. Sprinkle the top with the chopped peanuts. Bake for 45 minutes until golden brown. Cool completely before cutting into squares.

Tuesday, October 12, 2010

Kare Kare (Filipino Oxtail Stew)


My favorite Filipino dish is Kare Kare. Its a peanut butter-based oxtail stew that I never knew how to make from scratch. For years, I've always been using the powdered stuff, and so has my dad. My grandmother, however, made it from scratch. But, again, I never got the recipe. Hubby took a liking to Kare Kare, too, when I started making it for him. But he's only had the powdered version. My cousin, Jhune, is a great cook who told me that making Kare Kare from scratch required the use of grounded toasted rice. So I found this recipe that calls for the toasted rice. Surprisingly, it was pretty easy. The hardest part was grounding up the toasted rice. My food processor didn't ground it up finely, so I had to finish it off with my mortar and pestle. Otherwise this dish came out really well.

3-5 lbs. oxtail
5 Tbsp. cooking oil
5 cloves garlic, crushed
1 medium onion, sliced
1/4 cup annato seed water
1/4 lb. Chinese Long Beans, cut into 2-inch slices
1/2 lb. bok choy, stemmed
1/3 cup uncooked rice, toasted brown and ground to a powder
1/2 cup peanut butter, dissolved in 3/4 cup water
salt & pepper to taste

1) In a large pot, place oxtail and enough water to cover the meat. Boil for an hour. Discard water and rinse cooked meat. Place meat back in the pot and fill again with water enough to cover meat. Boil until tender.

2) In a sautee pan, heat oil and add onion and garlic. Cook until onion is softened. Add annatto water, garlic and onion to meat and return to boil. Add vegetables, powdered rice, and peanut butter mixture. Season with salt and pepper. Continue to boil until sauce slightly thickens. Serve with rice.


***You can also cook this dish in a crockpot by mixing all the ingredients together (except the vegetables) after the first boil of the meat. Place the whole mixture in a crockpot and cook it for 10 hours.

Monday, October 11, 2010

Viva Las Vegas

This was our 3rd trip to Vegas within the past 4 months or so. With each time attempting to dine at the famous Serendipity 3. This visit was actually intended for my mom's college reunion. Obviously, hubby and I didn't need to join in those festivities, so we opted to cruise the city with my siblings and decided to finally dine at this much awaited restaurant.

Reservations are not necessary, but definitely very helpful. So I made reservations a week in advance. We arrived at Serendipity 3 at Caesar's palace about half an hour early and was seated immediately, while other walk-in patrons had quite a wait. Since our reservations were for 11:30, we were still given the brunch menu. I didn't come to Serendipity for breakfast, so I ordered myself the hamburger with avocado, brie and grilled onions and a side of their sweet potato fries - highly recommended by fellow yelpers. My sister had the same plate.


One thing to note about this place is that they don't have a kids menu. So we had to order a regular sized meal for my daughter. And their regular sizes are HUGE. Enough for 2 people to share. So we all picked at my daughter's plate of chicken tenders with various dipping sauce. Her plate was quite yummy and she loved the fact that she got to dip her own chicken.

Having their huge portions, hubby felt like he was doing a Man Vs. Food challenge. He was only able to eat half of his omelet. He lost :)

My brother, on the other hand, devoured this massive French toast plate. He still craves it.

And finally, what we were all waiting for. The Frrrozen Hot Chocolate as featured in many food shows. This was the reason why we went to Serendipity.

Hubby, my daughter and I shared a Frrrozen Hot Chocolate for 2. My sister had a regular serving of the Frrrrozen White Chocolate while brother had a regular Double Frrrrozen Hot Chocolate. All were equally yummy. But I think I preferred the original. We still talk about our desserts until now. In fact, I'm craving it right now :)


Tuesday, October 5, 2010

Chocolate Chip Banana Muffins


We're going on a road trip to Vegas, and again, I wanted to make some snacks for the trip. And since I had some bananas left over, I wanted to make some kind of a muffin that we can also munch on for breakfast. Because who wants to waste money on breakfast while in Vegas, right? I'd rather spend money on a lunch buffet rather than a breakfast buffet. And maybe have some money left over for those penny slots. lol! Anyway, I didn't want to make just a plain 'ol banana muffin. Since I've been on a chocolate banana fix, I wanted to make something with that theme. So I did a search and found this from cdkitchen.com that looked easy. It called for chopped up candy bars, but since I had so much chocolate chips in my fridge, its what I used. It came out pretty good. What I'd like to do next time is put a dollop of hazelnut spread in the middle of the muffin for a secret surprise. I would've done that now, but I was afraid of how it might melt and ruin the batter. I'll experiment with that next time.

3 cups all purpose flour
3/4 cup brown sugar
3/4 cup sugar
1/2 tsp salt
1 cup butter, melted
1 cup mashed bananas
2 eggs, at room temperature
1/4 cup sour cream 1 tsp. vanilla extract
2 tsp. baking powder
1/4 tsp. baking soda
1 cup chocolate chips

1) Preheat oven to 375 deg F. Line muffin pan with muffin cups.

2) In a medium bowl, combine flour, sugars and salt. Stir in melted butter until moistened, using a fork. Reserve 1 cup of flour mixture and set aside. Add baking powder and baking soda in the remaining mixture. Set aside.

3) In a separate bowl, mix together banana, sour cream, eggs, and vanilla until well blended. Add banana mixture into flour mixture and stir until combined. Mix in chocolate chips.

4) Divide batter among prepared muffin cups. Crumble reserved flour mixture on top of batter and lightly press onto the top of each muffin. Bake for 25-30 minutes until golden and toothpick comes out clean. Serve warm or cooled with chocolate drizzled on top.

Monday, October 4, 2010

Creamy Taco Mac


I'm willing to admit the fact that I used to love Hamburger Helper. In fact, I think my skills at cooking the boxed dinner stuff is what somehow won hubby over when we were dating in college. I lived off of that stuff, and I think cooking it inspired me to cook even more. Since I started cooking from scratch, though, I began to ween myself off of the boxed stuff. So I haven't cooked it in a while. Then I found this Creamy Taco Mac recipe from one of my favorite blogs, Annie's Eats. Man oh man, this dish tasted exactly like the Hamburger Helper I used to have when I was younger. I can't believe how much I missed that stuff. Though I think this is a wee bit better than the boxed version. But then again, I think I'm being a bit biased.

1 lb. ground turkey
8 oz dry pasta (make sure to reserve 1 cup pasta water)
1 small onion, diced
1 clove garlic, minced
1 (14.5 oz) can diced tomato
4 Tbsp. taco seasoning (1 packet)
3 oz cream cheese
1 cup sour cream
salt and pepper to taste
shredded cheese (optional)

1) Cook pasta according to directions on package. Reserve 1 cup pasta water and drain the rest of the pasta.

2) Over medium heat, brown meat and drain off the fat. Add onion and garlic. Cook until onion is softened. Add taco seasoning and diced tomatoes and simmer for about 5 minutes.

3) Add cream cheese and sour cream. Add reserved pasta water a little at a time, enough to just thin out the mixture. Season with salt and pepper. Stir until cream cheese has melted and sauce is well blended. Add pasta and stir until well combined. Simmer on medium-low for about 5 minutes to reduce the sauce a bit. Remove from heat and top with shredded cheese if desired.

Sunday, October 3, 2010

Chocolate Banana Wontons


I've heard of a food truck called Dumpling Station. I haven't been able to catch up to it, but their menu looked yummy. What especially caught my eye was their Chocolate Banana Wontons. What a great idea! I'm in a chocolate-banana fix lately after making my Chocolate Banana Stuffed French Toast for breakfast this morning. I remember seeing Giada de Laurentiis make a similar version of Chocolate Banana Wontons. Here's my quick and easy version. This was so yummy. Make this one because it'll definitely impress and is made in a jiffy.

wonton wrappers
banana slices
chocolate hazelnut spread
oil for frying
confectioner's sugar for garnish

1) Pour enough oil in a deep frying pan so that it is about 1-2 inches deep. Heat on medium heat.

2) In the middle of a wonton wrapper, place a banana slice. Top with with a teaspoon of chocolate hazelnut spread. Dampen the edges of the wrapper with water. Fold wrapper over chocolate banana and seal the edges together. Deep fry until golden brown. Place on a paper towel to drain excess oil. Dust with confectioner's sugar.

Chocolate Banana Stuffed French Toast


Its another one of those lazy Sundays we're having and I wanted to have a nice breakfast for us. I found a recipe for a Banana-Nutella Stuffed Croissant from a Costco recipe book that I've had for a couple of years and it looked so delicious on the picture. So I wanted to someday make it. Unfortunately, I always seem to forget to buy croissants. But I wanted to try to make something similar to it and I did have some bananas and sandwich bread. So I decided to improvise and came up with this recipe. And it was sooooo good! Hubby couldn't stop raving about it while he was eating it. This is a nice twist to a regular french toast. I'll definitely make this again.

4 slices of sandwich bread
4 Tbsp. cream cheese, softened
4 Tbsp. chocolate hazelnut spread
1 banana, sliced into rounds
6 Tbsp. brown sugar
1 egg, beaten
1/2 cup milk
1 Tbsp. rum
1/2 tsp. vanilla extract
a pinch of ground cinnamon
butter
confectioner's sugar, for garnish

1) Spread cream cheese on one side of each slice of bread. Spread chocolate hazelnut spread on top of cream cheese. Set aside.

2) In a small saucepan, toss banana slices with brown sugar. Heat mixture on medium heat until sugar melts. Place mixture on top of 2 of the sliced bread topped with chocolate/cream cheese spread. Place the other 2 slices on top of the banana, chocolate side down, to make a sandwich.

3) In a bowl, combine egg, milk, rum, vanilla extract and cinnamon. Dip each side of the sandwich in batter. Heat a sautee pan over medium heat and coat with a little butter. Cook sandwich like french toast, turning once. Top with confectioner's sugar.

Saturday, October 2, 2010

Spinach and Bacon Quiche


I've been wanting to make quiche for a while now ever since a quiche recipe popped up on my reader. I thought it looked so easy and I love quiche. So when I was at the supermarket yesterday, I figured I should buy all the ingredients I needed. Which isn't much. I had most of the ingredients at home already. I just needed the pie shell.

This recipe is from Paula Deen and I found it on the Food Network website. It received great reviews and looked really easy, so I wanted to give it a try. I modified the original recipe a bit, based on the reviews. Specifically, I decreased some of the ingredients because it looked like it would overflow from the pan. It came out so yummy. I can't believe how easy this recipe was.

1 1/2 cups shredded cheese
1 (9-inch) refrigerated pie crust

1) Preheat oven to 375 deg F.

2) Combine eggs, cream (or half & half), salt and pepper in a food processor or blender. Layer spinach, bacon, and cheese on the bottom of the pie crust. Pour egg mixture on top. Place crust on a large backing dish (to help catch the overflow while baking). Bake for 35-45 minutes until the egg is set.